Back in 2018, I wrote a blog post about my Home Lab environment, which I had built around VMware vSphere to showcase various SQL Server workloads and demonstrate how to troubleshoot performance-related problems.
Since then, a lot has changed – especially with the acquisition of VMware by Broadcom. In the past, I was a subscriber to the VMUG Advantage program, which offered non-production licenses for the entire VMware stack at a very reasonable cost. This made it perfect for home lab environments. Unfortunately, Broadcom has since discontinued the program, and as of this writing, there is no longer an affordable way to obtain licenses for products like vCenter, vSAN, NSX, and others. As a result, I decided to migrate my entire Home Lab to a different hypervisor. After evaluating my options, I chose Proxmox, for several reasons:
- It’s open source and free to use
- Many of my customers have also migrated from VMware vSphere to Proxmox following the Broadcom acquisition
- Proxmox is maintained by a company based in Vienna — just a few kilometers from where I live 🙂
- It has a strong and active community
In this blog post, I’ll give you an overview of the hardware I’m currently using in my Home Lab, because a lot has changed since 2018.
My motivation for a dedicated Home Lab
When we moved into our newly built house in Vienna 18 years ago, I already had a vision: I wanted a powerful Home Lab where I could run serious SQL Server workloads and experiment with the latest hardware technologies. With that in mind, I bought a 26U server rack in 2007. Back then, the rack was modestly equipped – with a basic Netgear switch and a router for the internet connection.
Each room in the house was wired with a 1 Gbit Ethernet connection to the switch, routed through a patch panel in the basement. To be honest, the 26U rack was massively over-provisioned at the time. Fast forward to the summer of 2017 – I returned to that original idea of building a serious Home Lab and started planning how to make it a reality. Here were my key goals:
- I wanted real x86 servers that could be mounted on rails in the rack. No desktop tower PCs.
- Each server needed to have at least a 10 Gbit Ethernet connection to ensure fast communication. A 10 Gbit link delivers about 1.2 GB/sec throughput.
- I aimed to deploy a full Software-Defined Data Center (SDDC) – with compute, storage, and networking fully virtualized – without relying on expensive, slow shared storage (which would have blown my budget).
- And most importantly: I wanted to have as much fun as possible 😉.
Based on these requirements, I decided in 2017 to purchase a few refurbished x86 servers and start building out the lab. Over the last months I have rebuilt my Home Lab, so let’s take a look at the current state of my Home Lab:
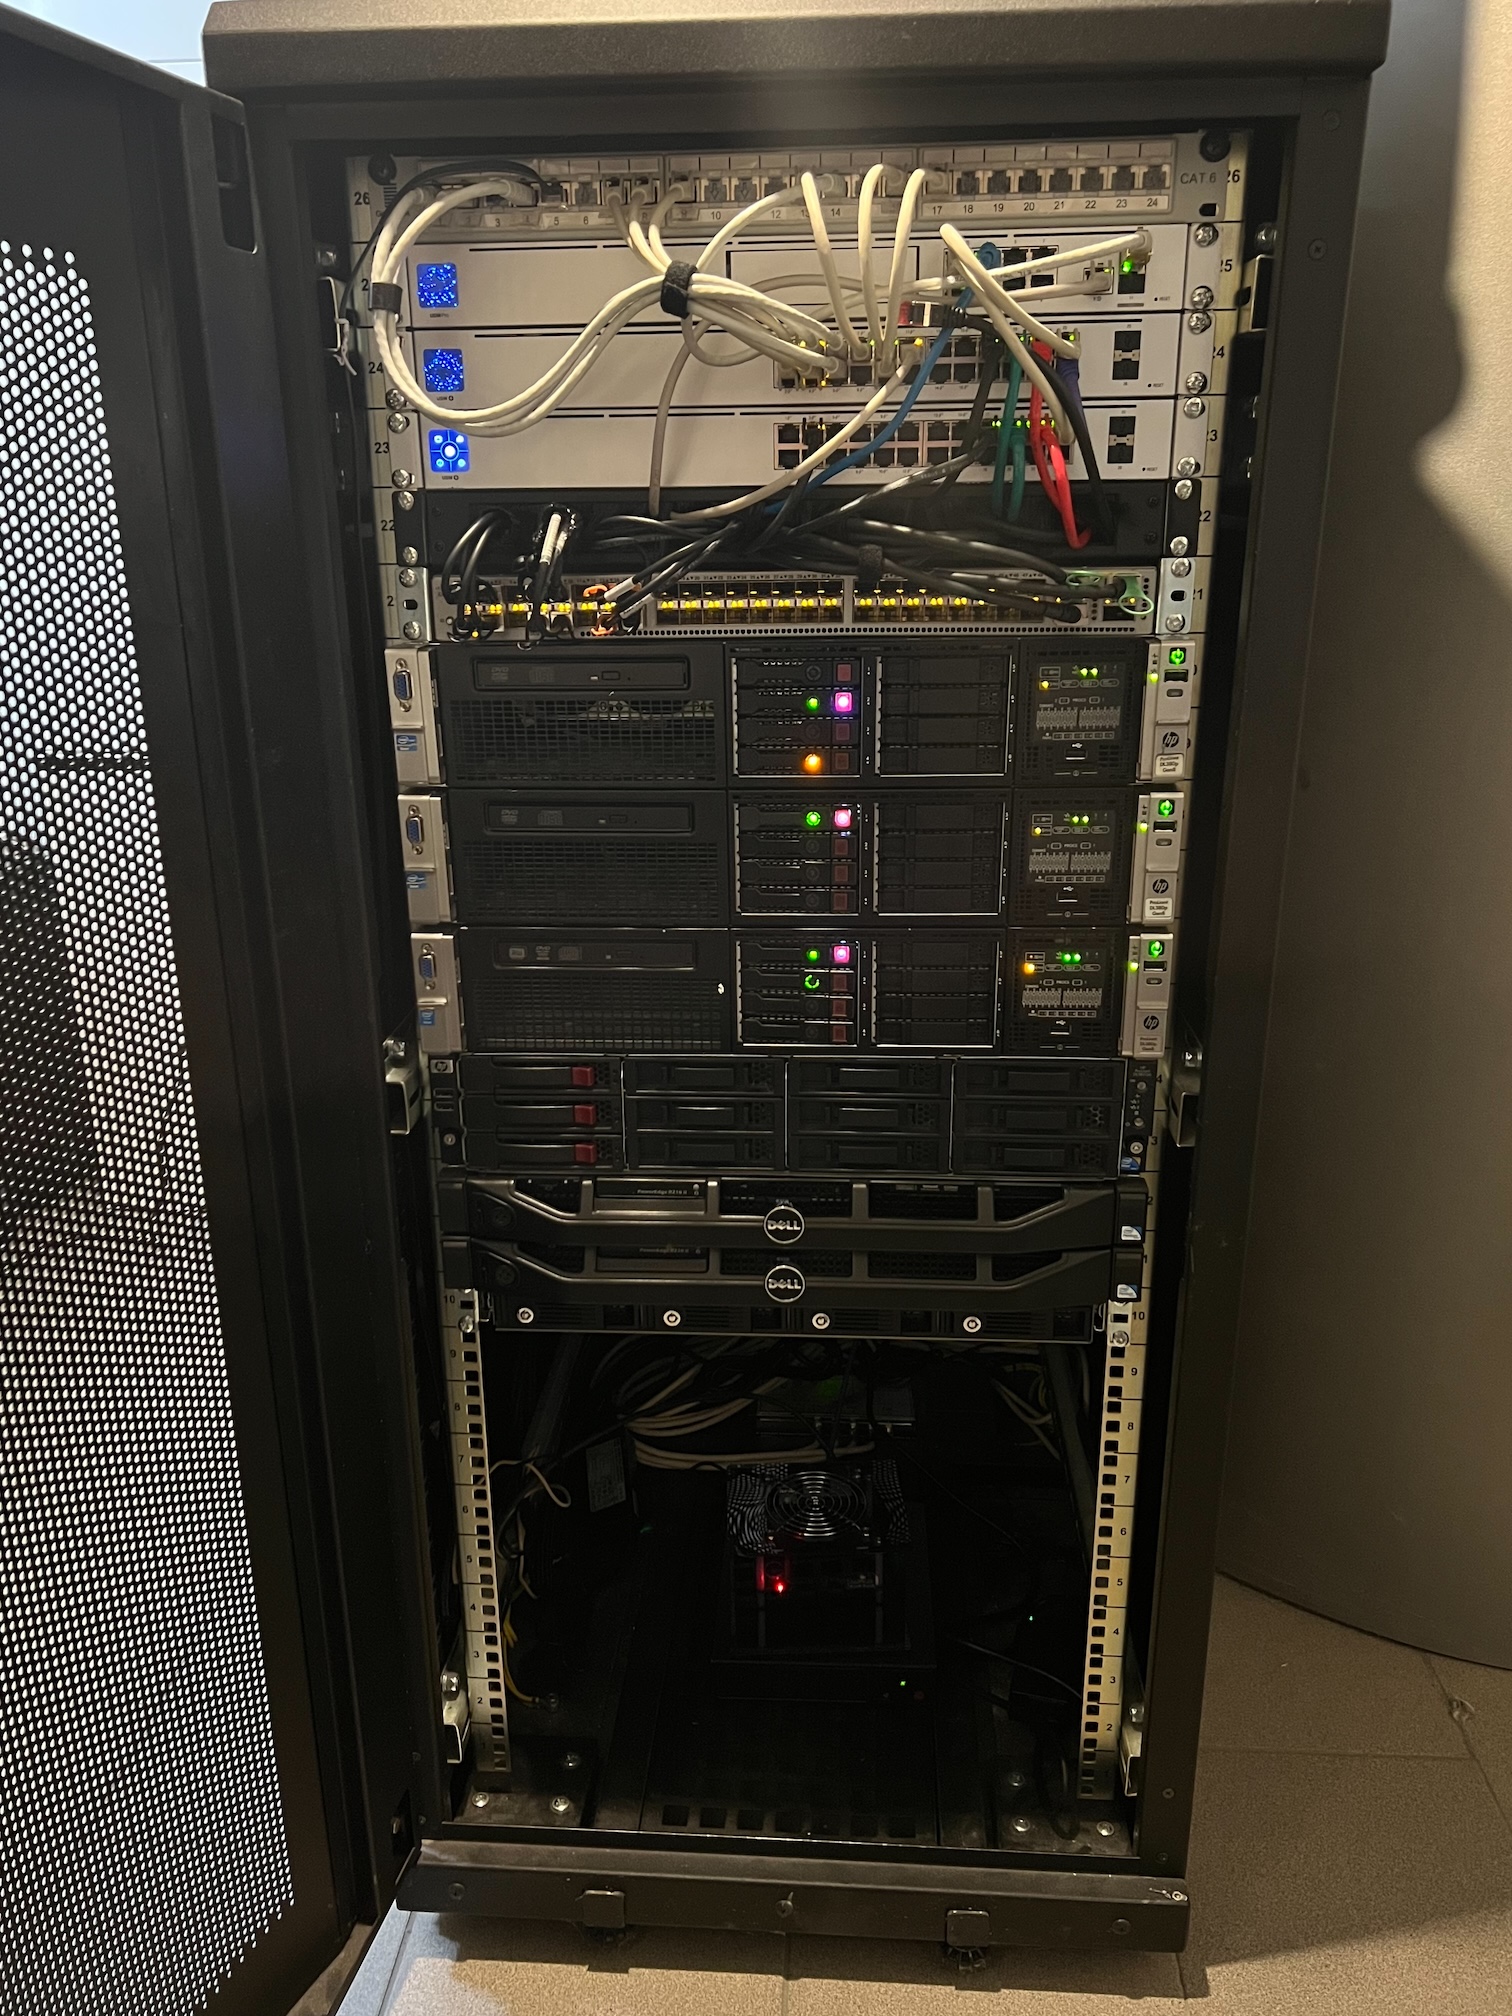
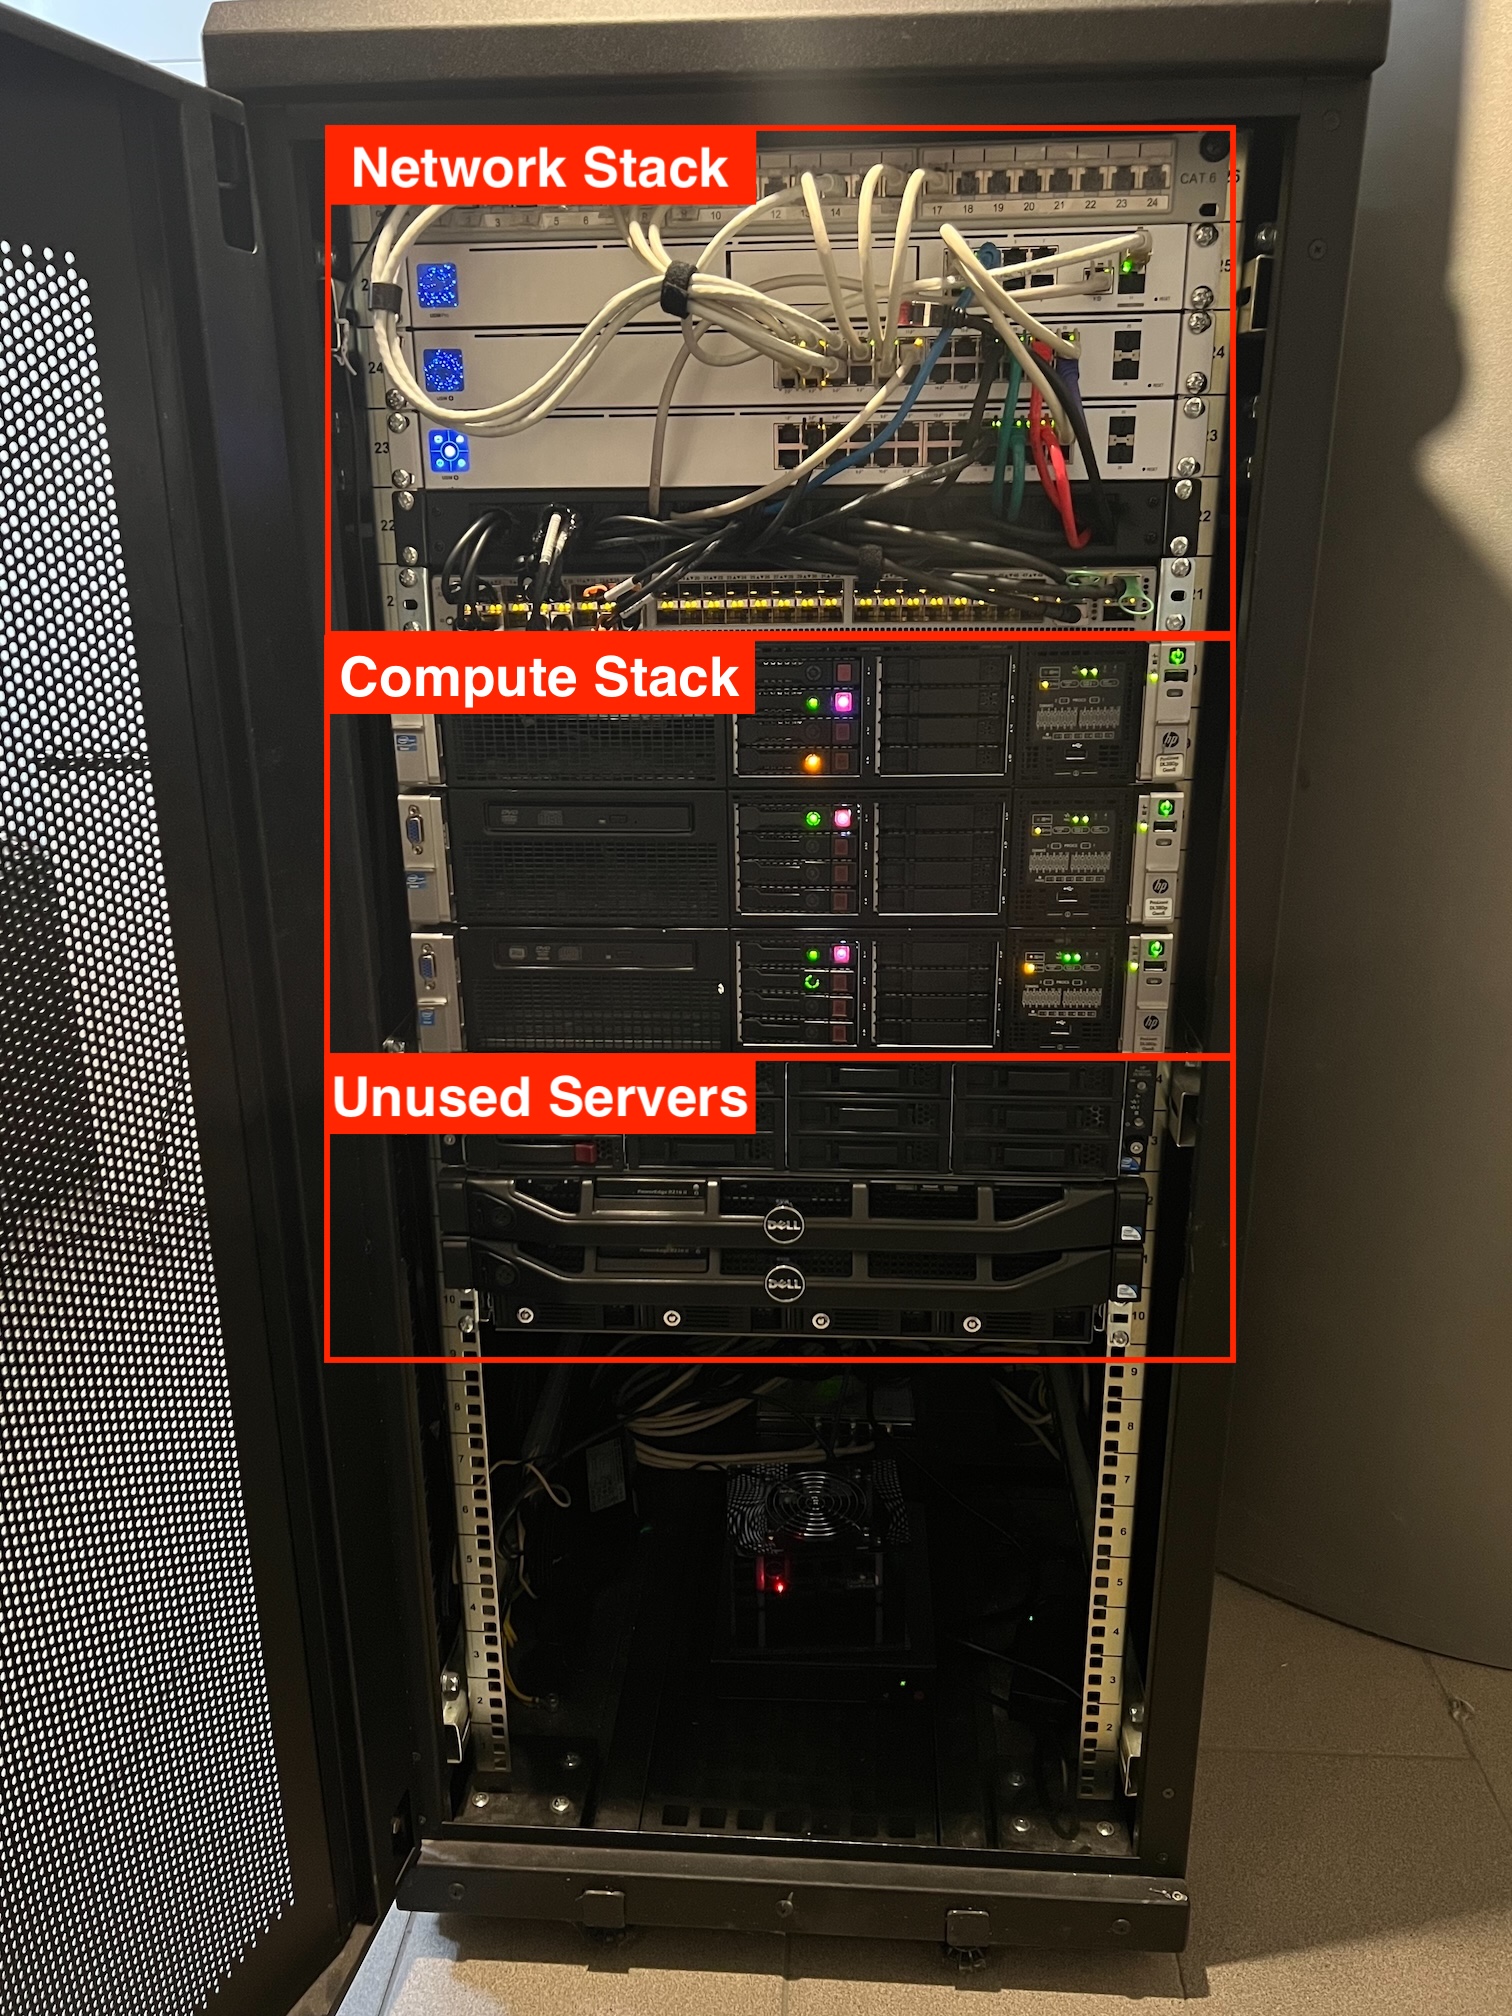
Here you can see the full setup – up and running – drawing about 1 kW of power per hour. As shown in the picture, I’m currently using 17 rack units for the deployment. The server rack is logically divided into three main sections:
- Network Stack
- Compute Stack
- Unused Servers
Here’s a labeled version of the rack layout for better orientation:
But before I dive into the details of each stack, let’s take a look at the internet and power infrastructure that supports it all.
Internet and Power Infrastructure
Since the COVID-19 pandemic, the way many of us work has changed dramatically. Before the pandemic, I was almost always on the road, working with customers across Europe to improve the performance and high availability of their SQL Server environments. My wife, who works as an IT business analyst, also commuted to her office daily. But since COVID-19, both of us have been working from home nearly full-time. That means a fast, reliable internet connection is just as essential as uninterrupted power throughout the day.
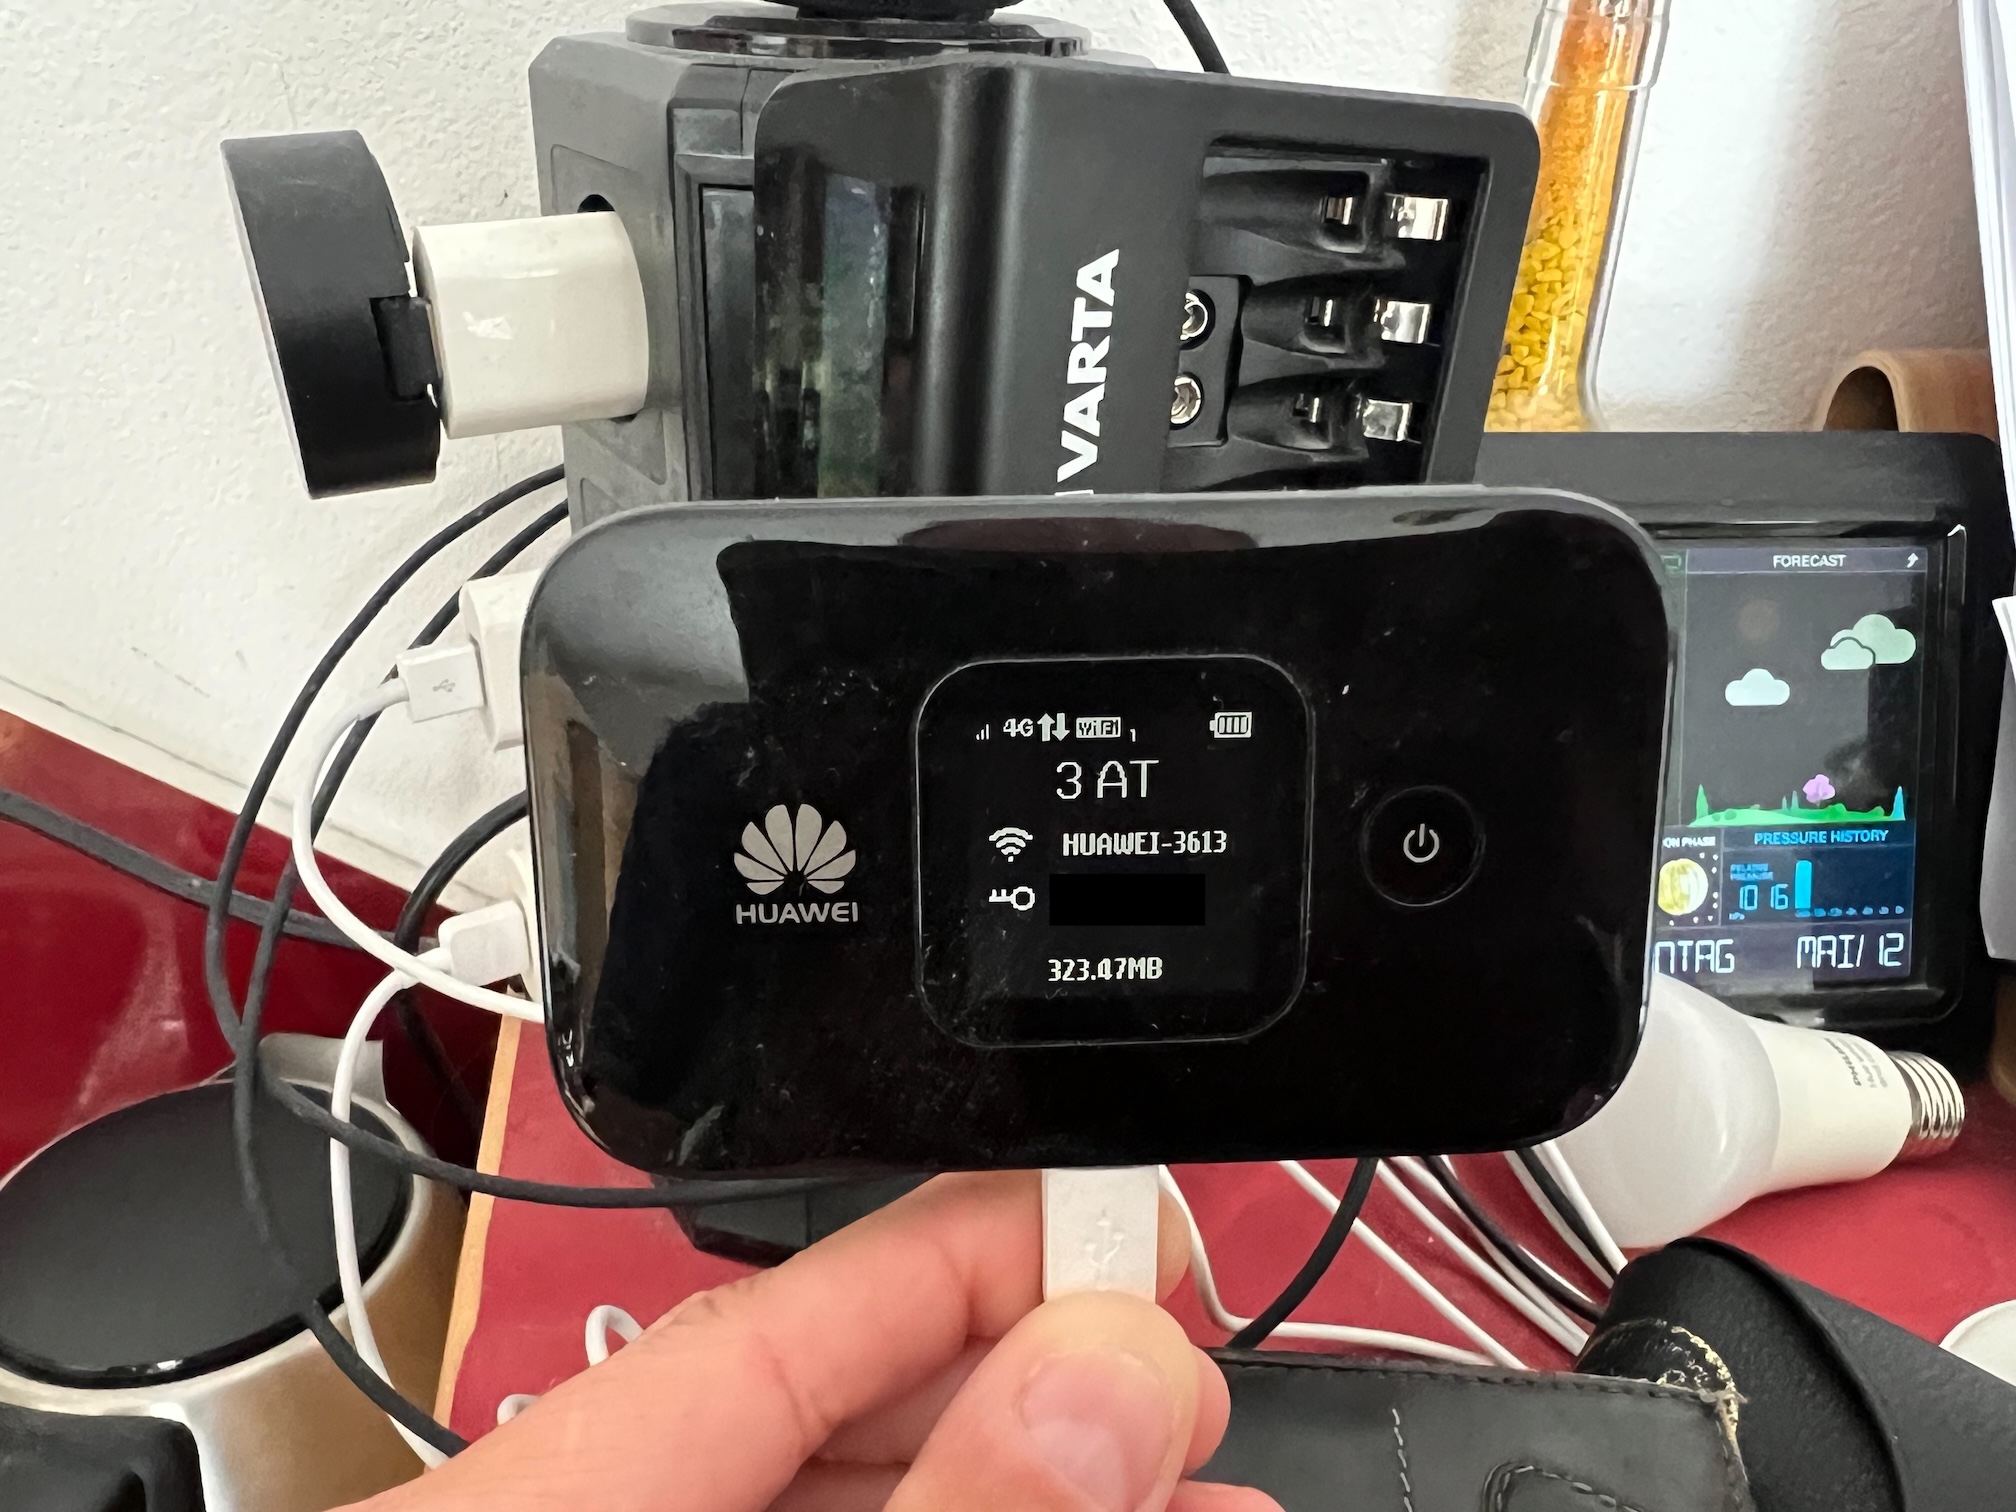
One challenge we face in Vienna is that no internet provider currently offers fiber-optic connectivity in the area where we live. To work around this, I decided to subscribe to a mobile 5G internet service from our carrier, A1 Telekom Austria. The connection provides:
- Downlink speeds up to 500 Mbit/sec (in practice, we typically get around 300–400 Mbit/sec)
- Uplink speeds of about 60 Mbit/sec
This is a huge improvement over our previous connection (30 Mbit down/5 Mbit up), though of course it’s still far from a symmetric 1 Gbit fiber-optic connection. But you work with what you’ve got.
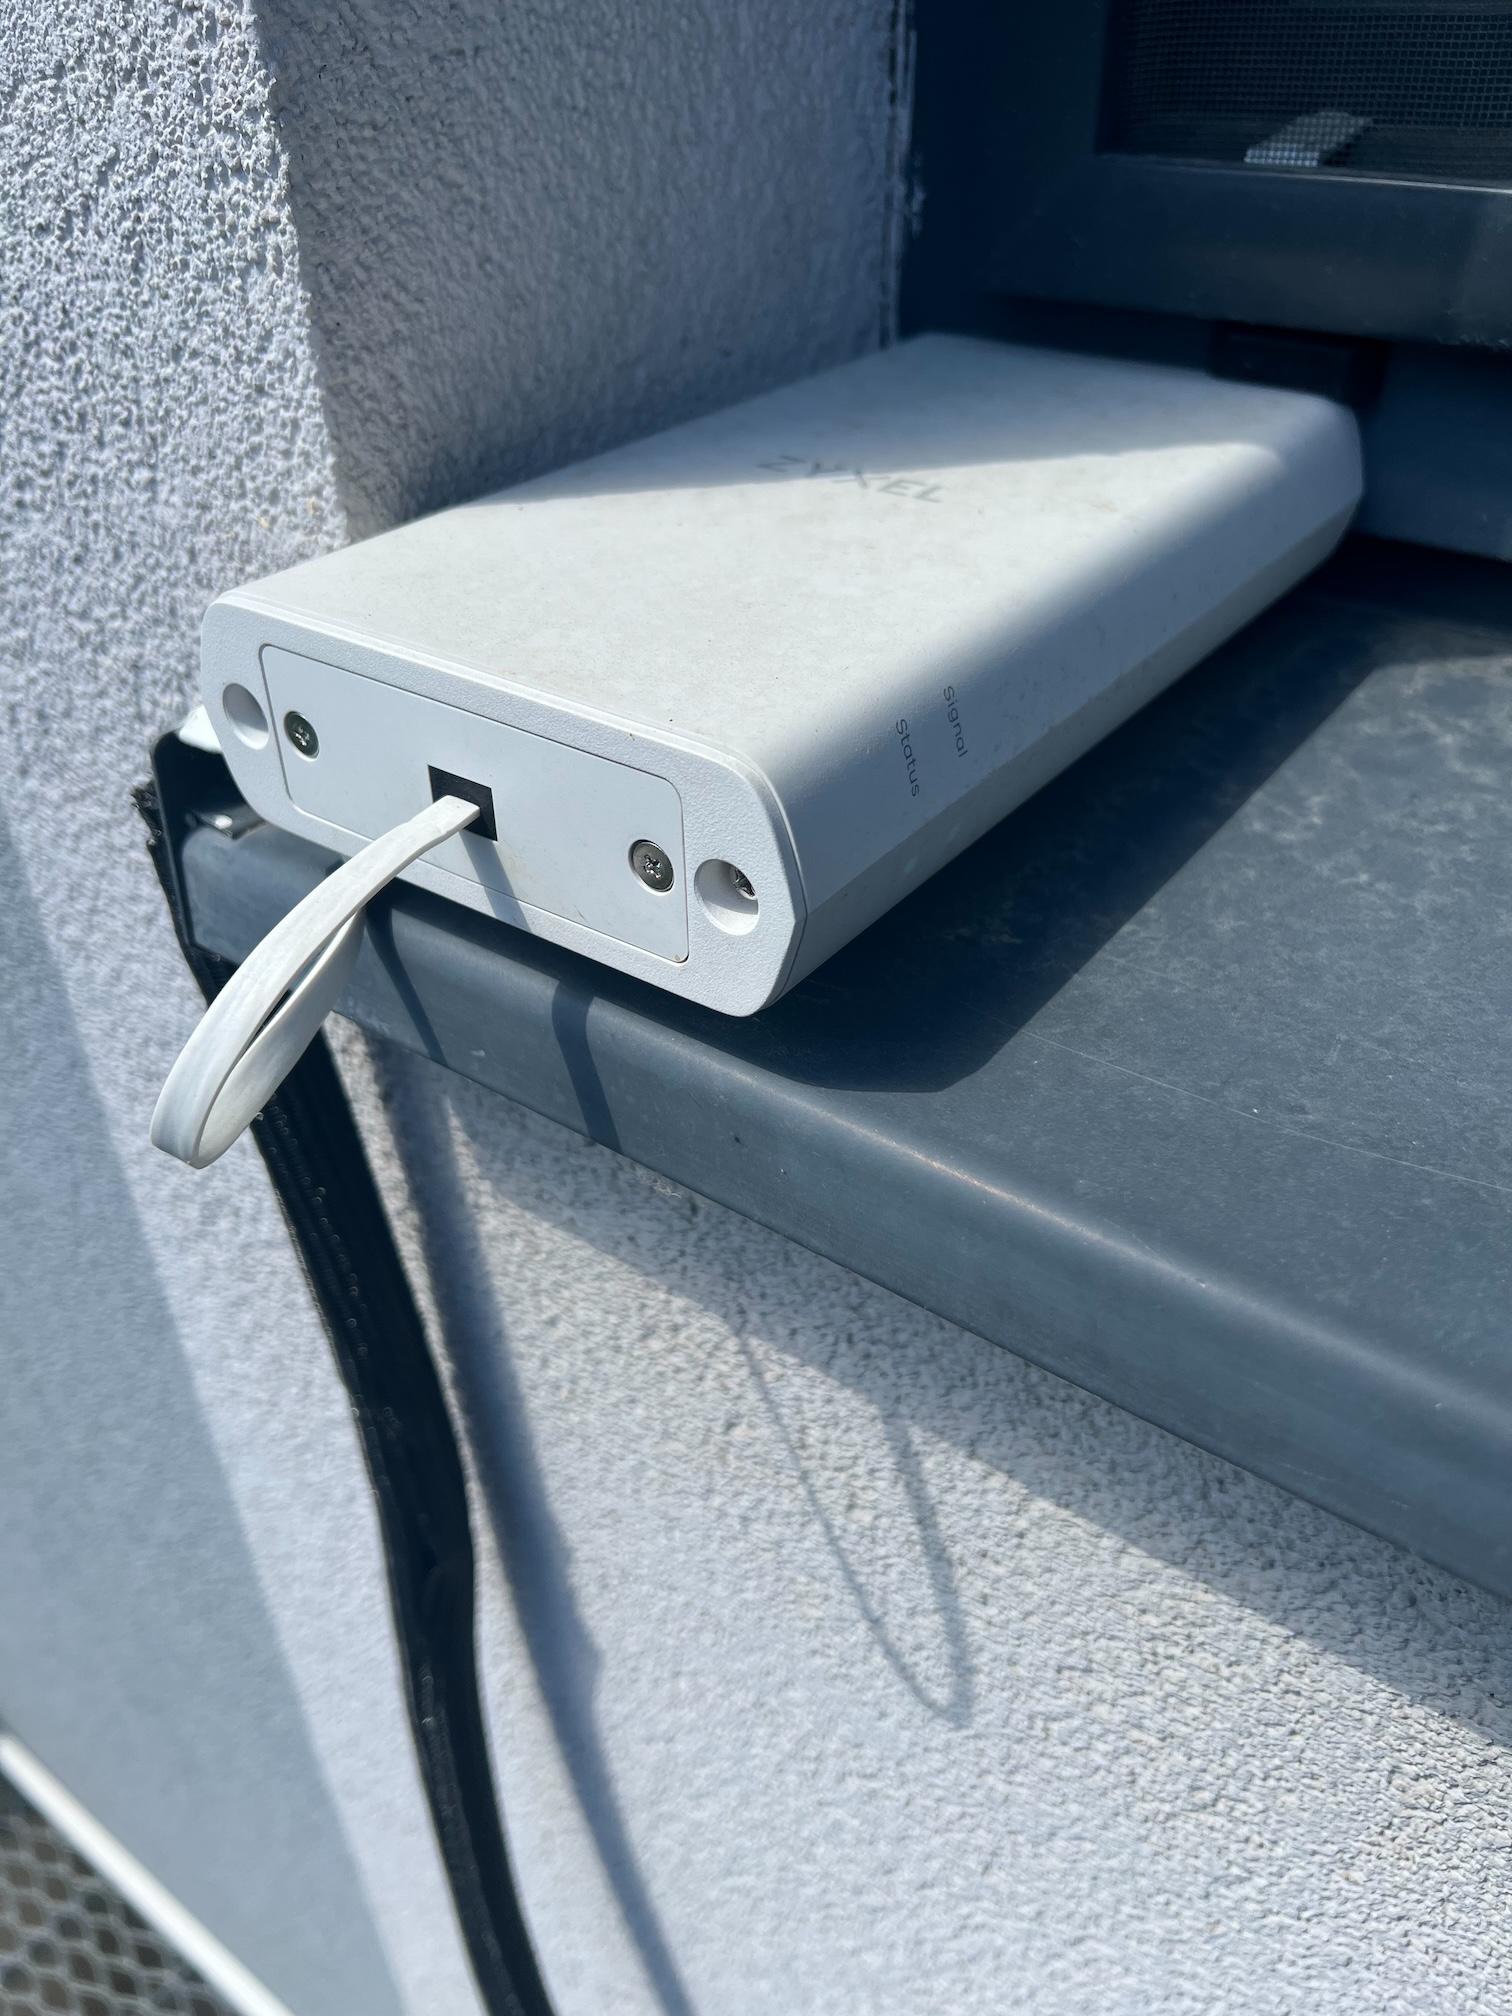
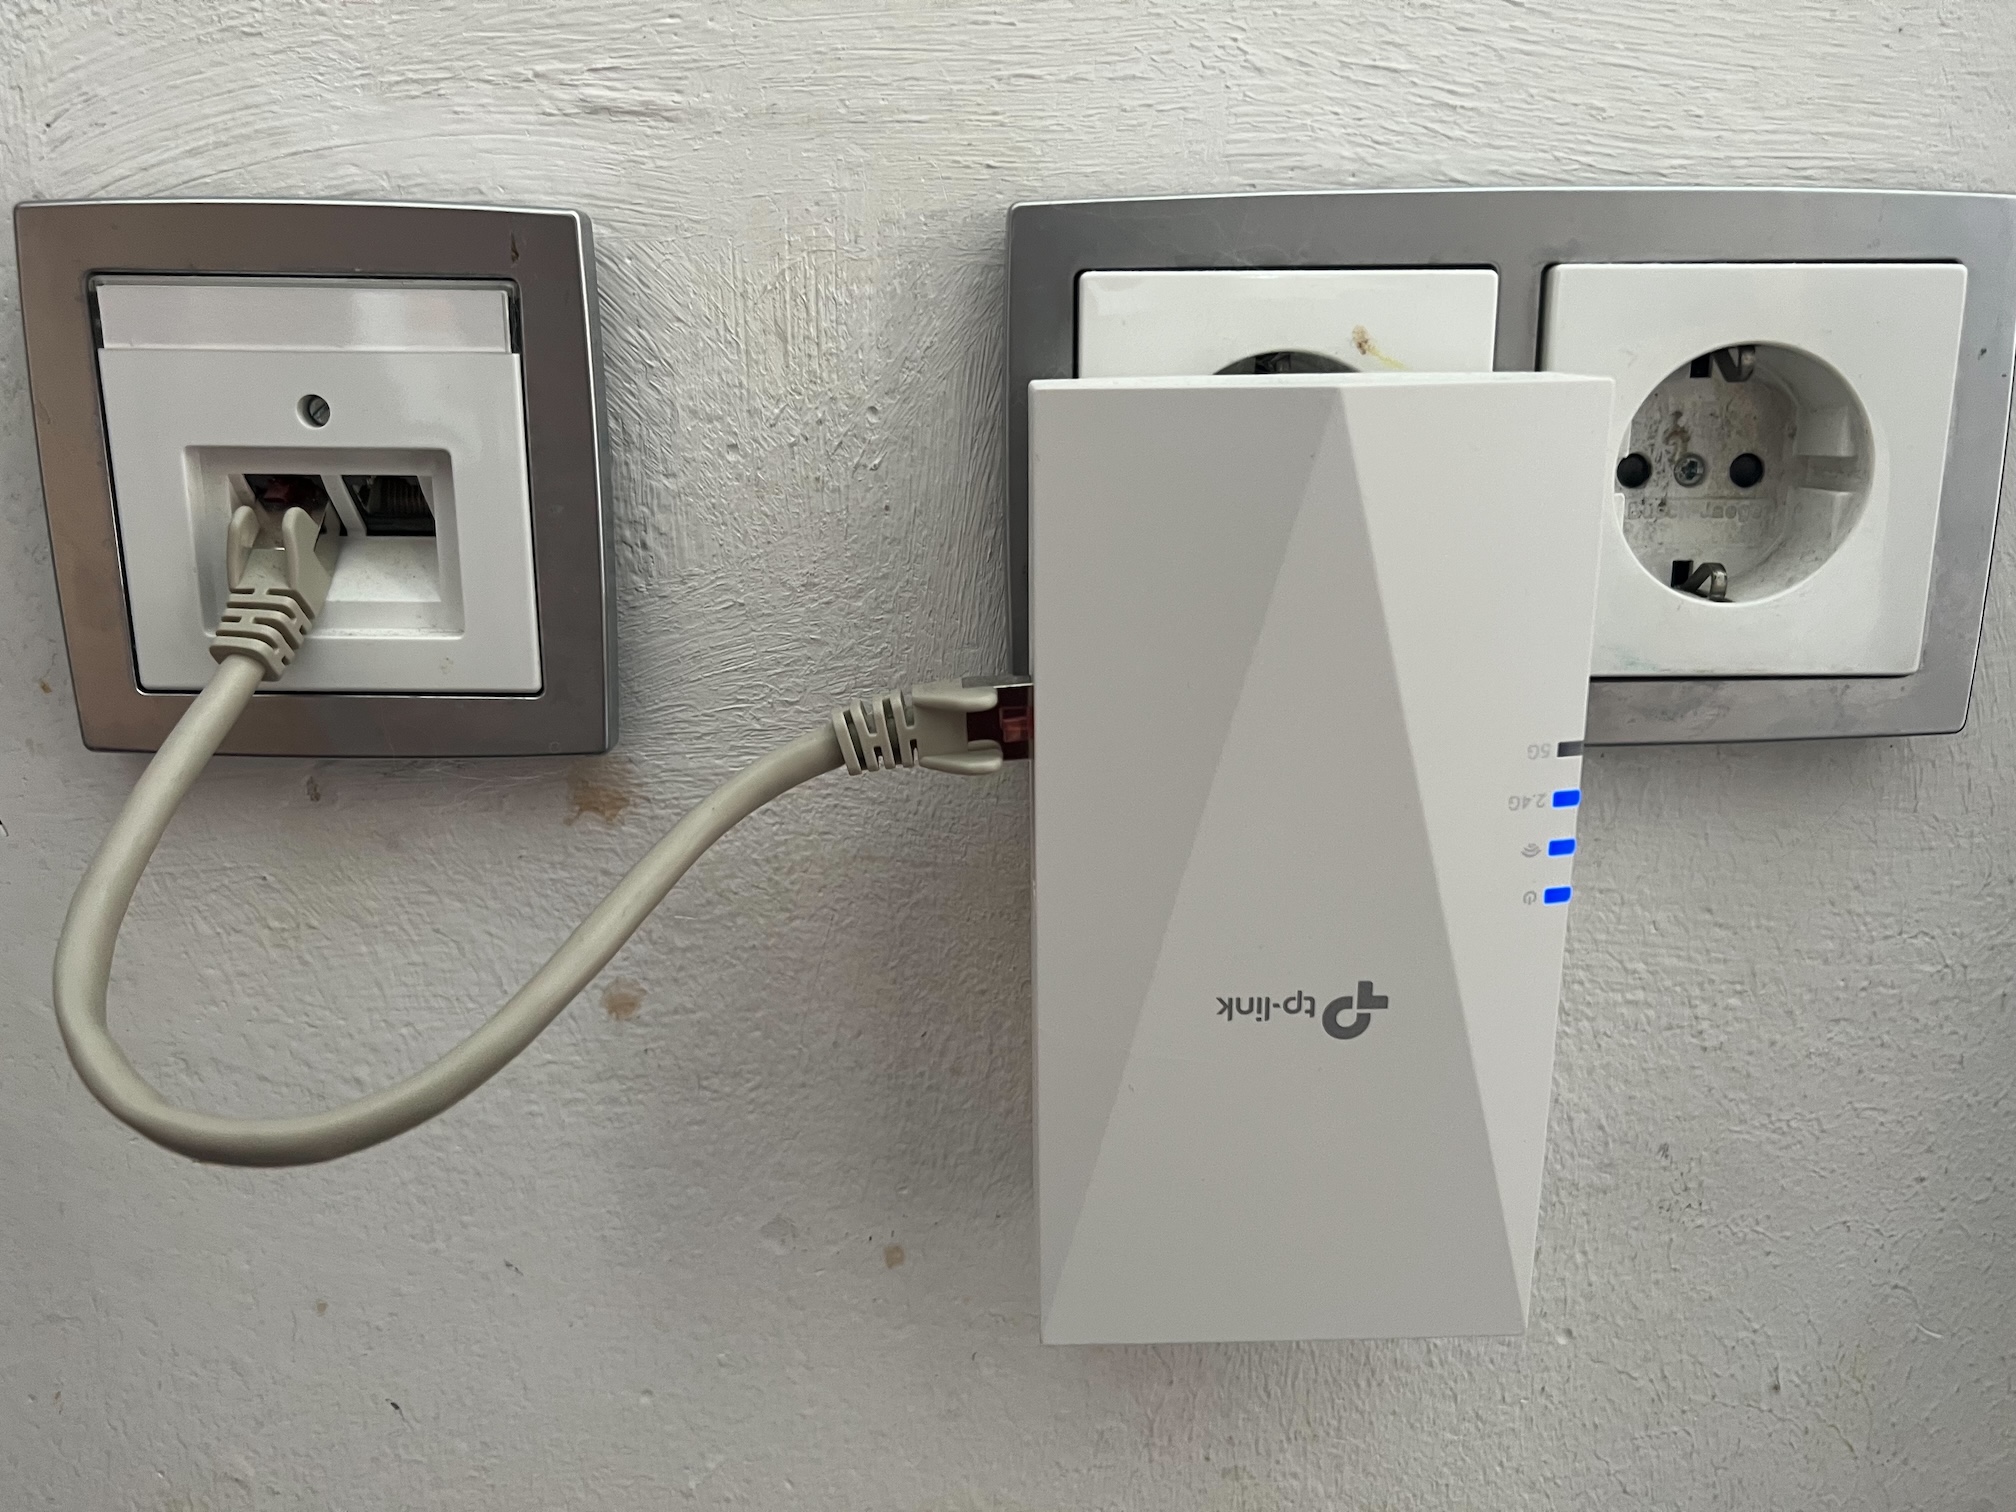
Since I have reliability and high availability “built into my DNA”, a single internet connection is naturally a single point of failure – not acceptable when both of us rely on the internet for work. That’s why I’ve added a secondary 4G backup connection, integrated into our network via a Wi-Fi extender. In the next section, I’ll explain how both connections are configured with automatic failover to ensure a highly available and stable internet connection.
Of course, internet reliability is only half the equation – we also need uninterrupted power, ideally at an affordable cost. Back in 2022, when the energy crisis hit following Russia’s invasion of Ukraine, we decided to invest in a solar panel system. With energy prices exceeding EUR 0.50 per kWh, it was a no-brainer. Today, we have a 10 kWp solar array and two 8 kWh batteries installed in our basement (plus a portable 2 kWh battery from Bluetti).
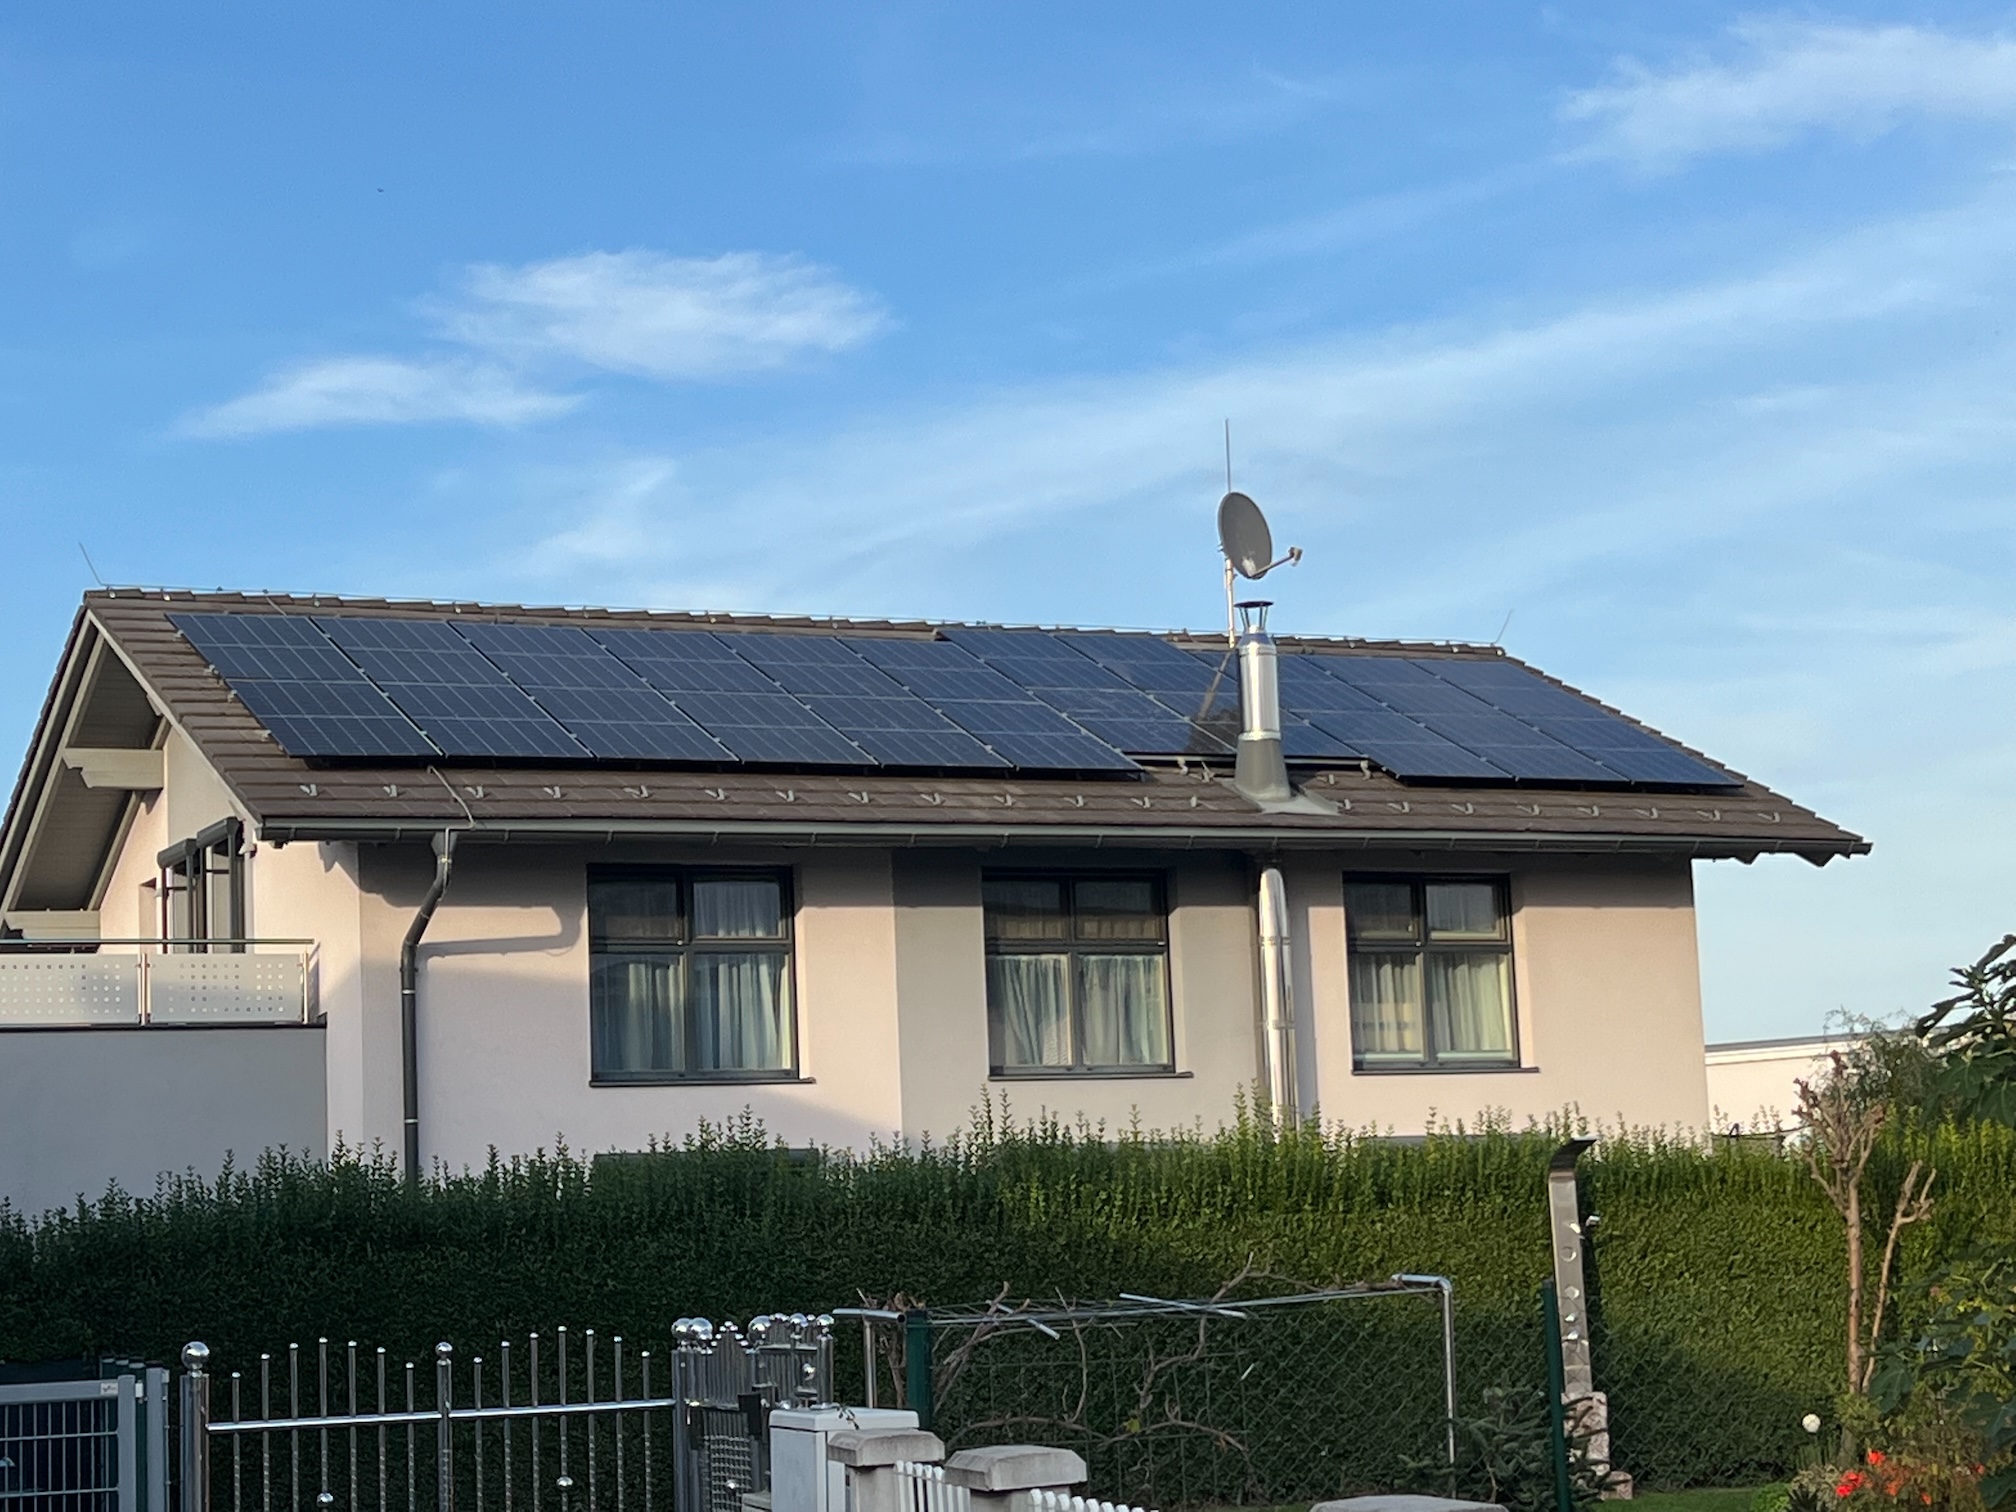
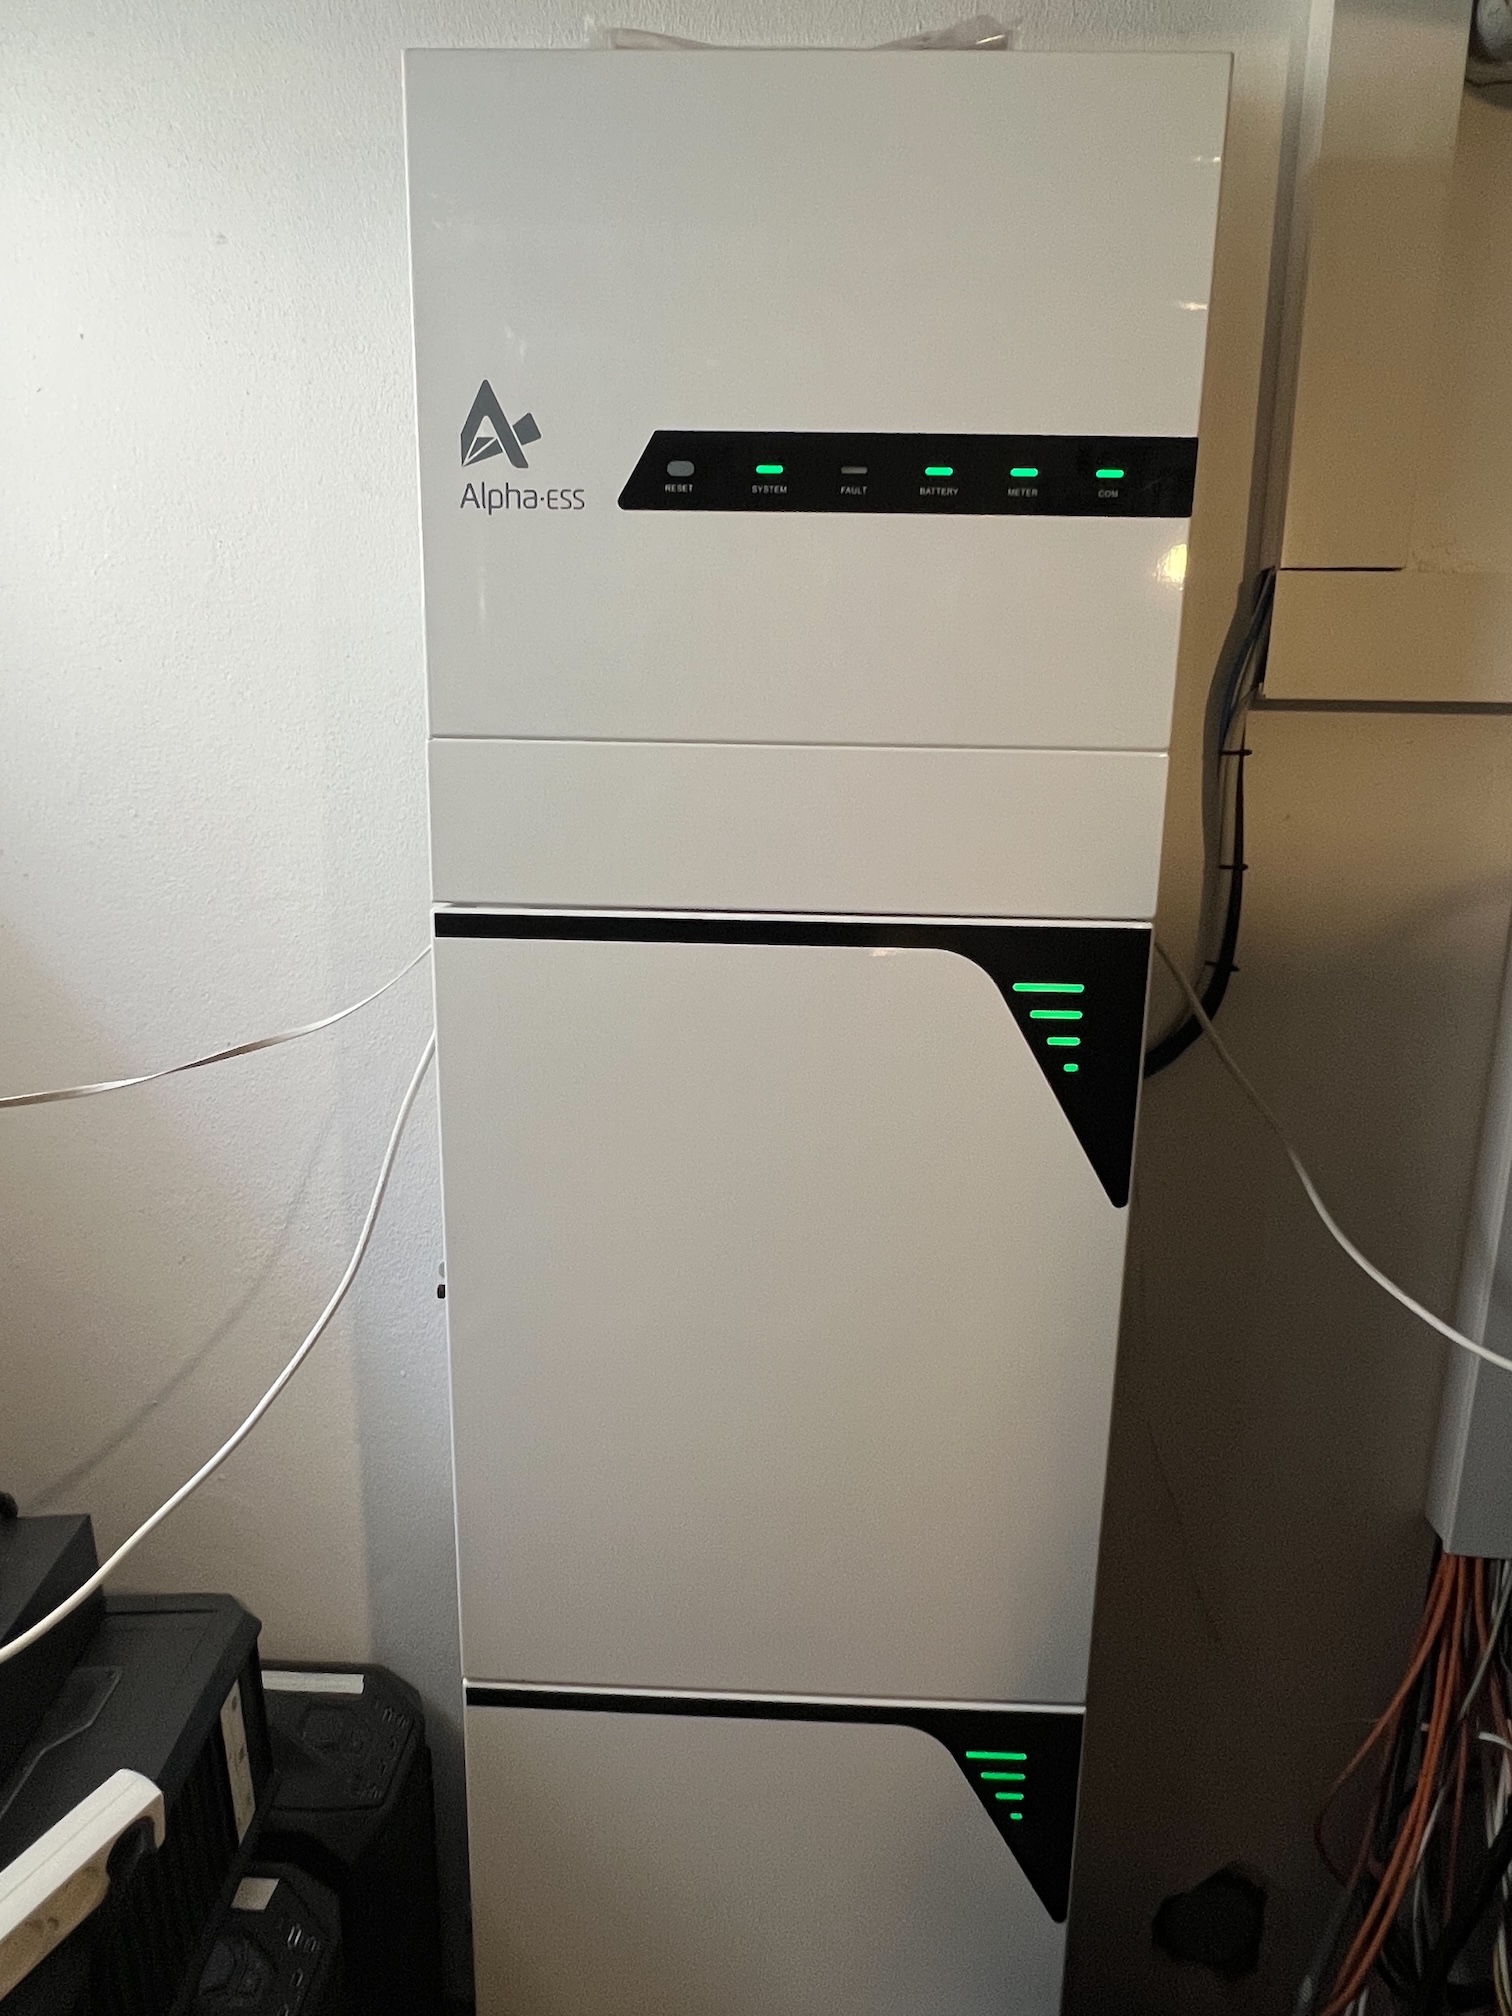
The system uses a fail-safe inverter, which automatically switches our home’s power supply to the batteries whenever the main grid fails. It also supports a full “cold start” from solar energy, meaning we can reboot the entire system even if the grid is offline for an extended period (e.g., during a blackout). From April to October, we are completely energy-autonomous – we don’t buy any electricity from the grid. However, during November to March, our energy needs increase due to our air-to-water heat pump, which naturally requires more power than we can generate in the winter months.
Networking Stack
Let’s now take a closer look at the Networking Stack of my Home Lab. This part of the setup is located at the top of the server rack and currently consists of the following devices:
- 1× UniFi Dream Machine
- 2× Ubiquiti (Ubnt) Switches
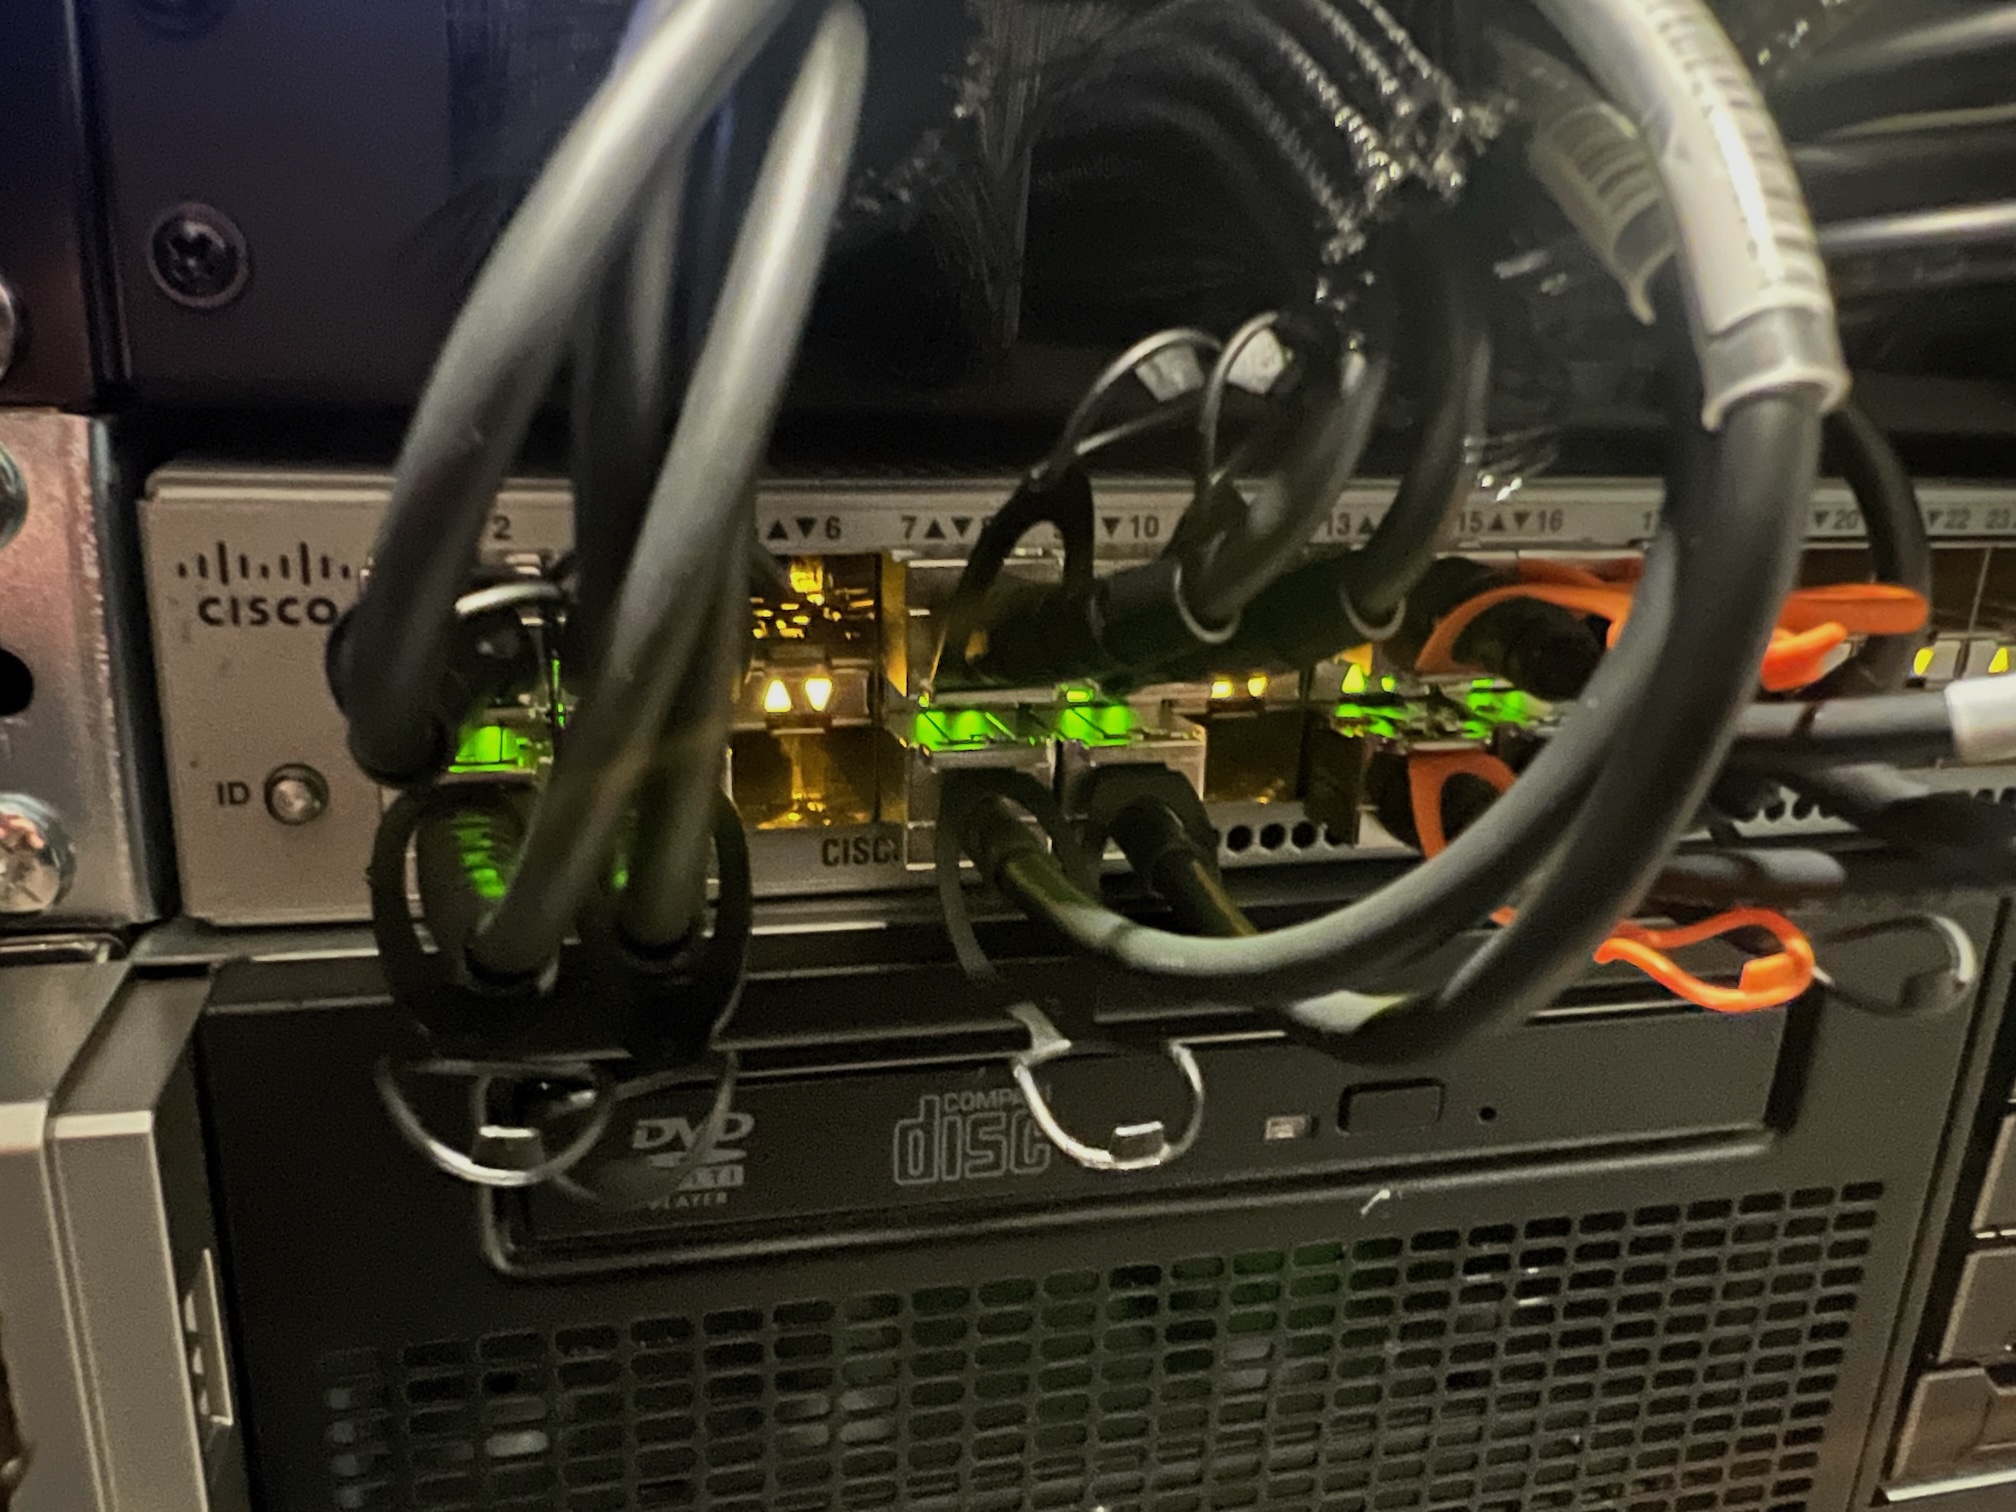
- 1× Cisco Nexus 3064 10 Gbit Switch
The UniFi Dream Machine serves as the internet router and connects via its two WAN ports to both the mobile 5G and 4G backup internet connections. These WAN ports are configured in failover mode – so if one internet connection drops, the other automatically takes over. When the 5G link comes back online, the system performs an automatic failback. This setup works very smoothly; even during a Microsoft Teams call, you hardly notice the switch to the secondary connection.
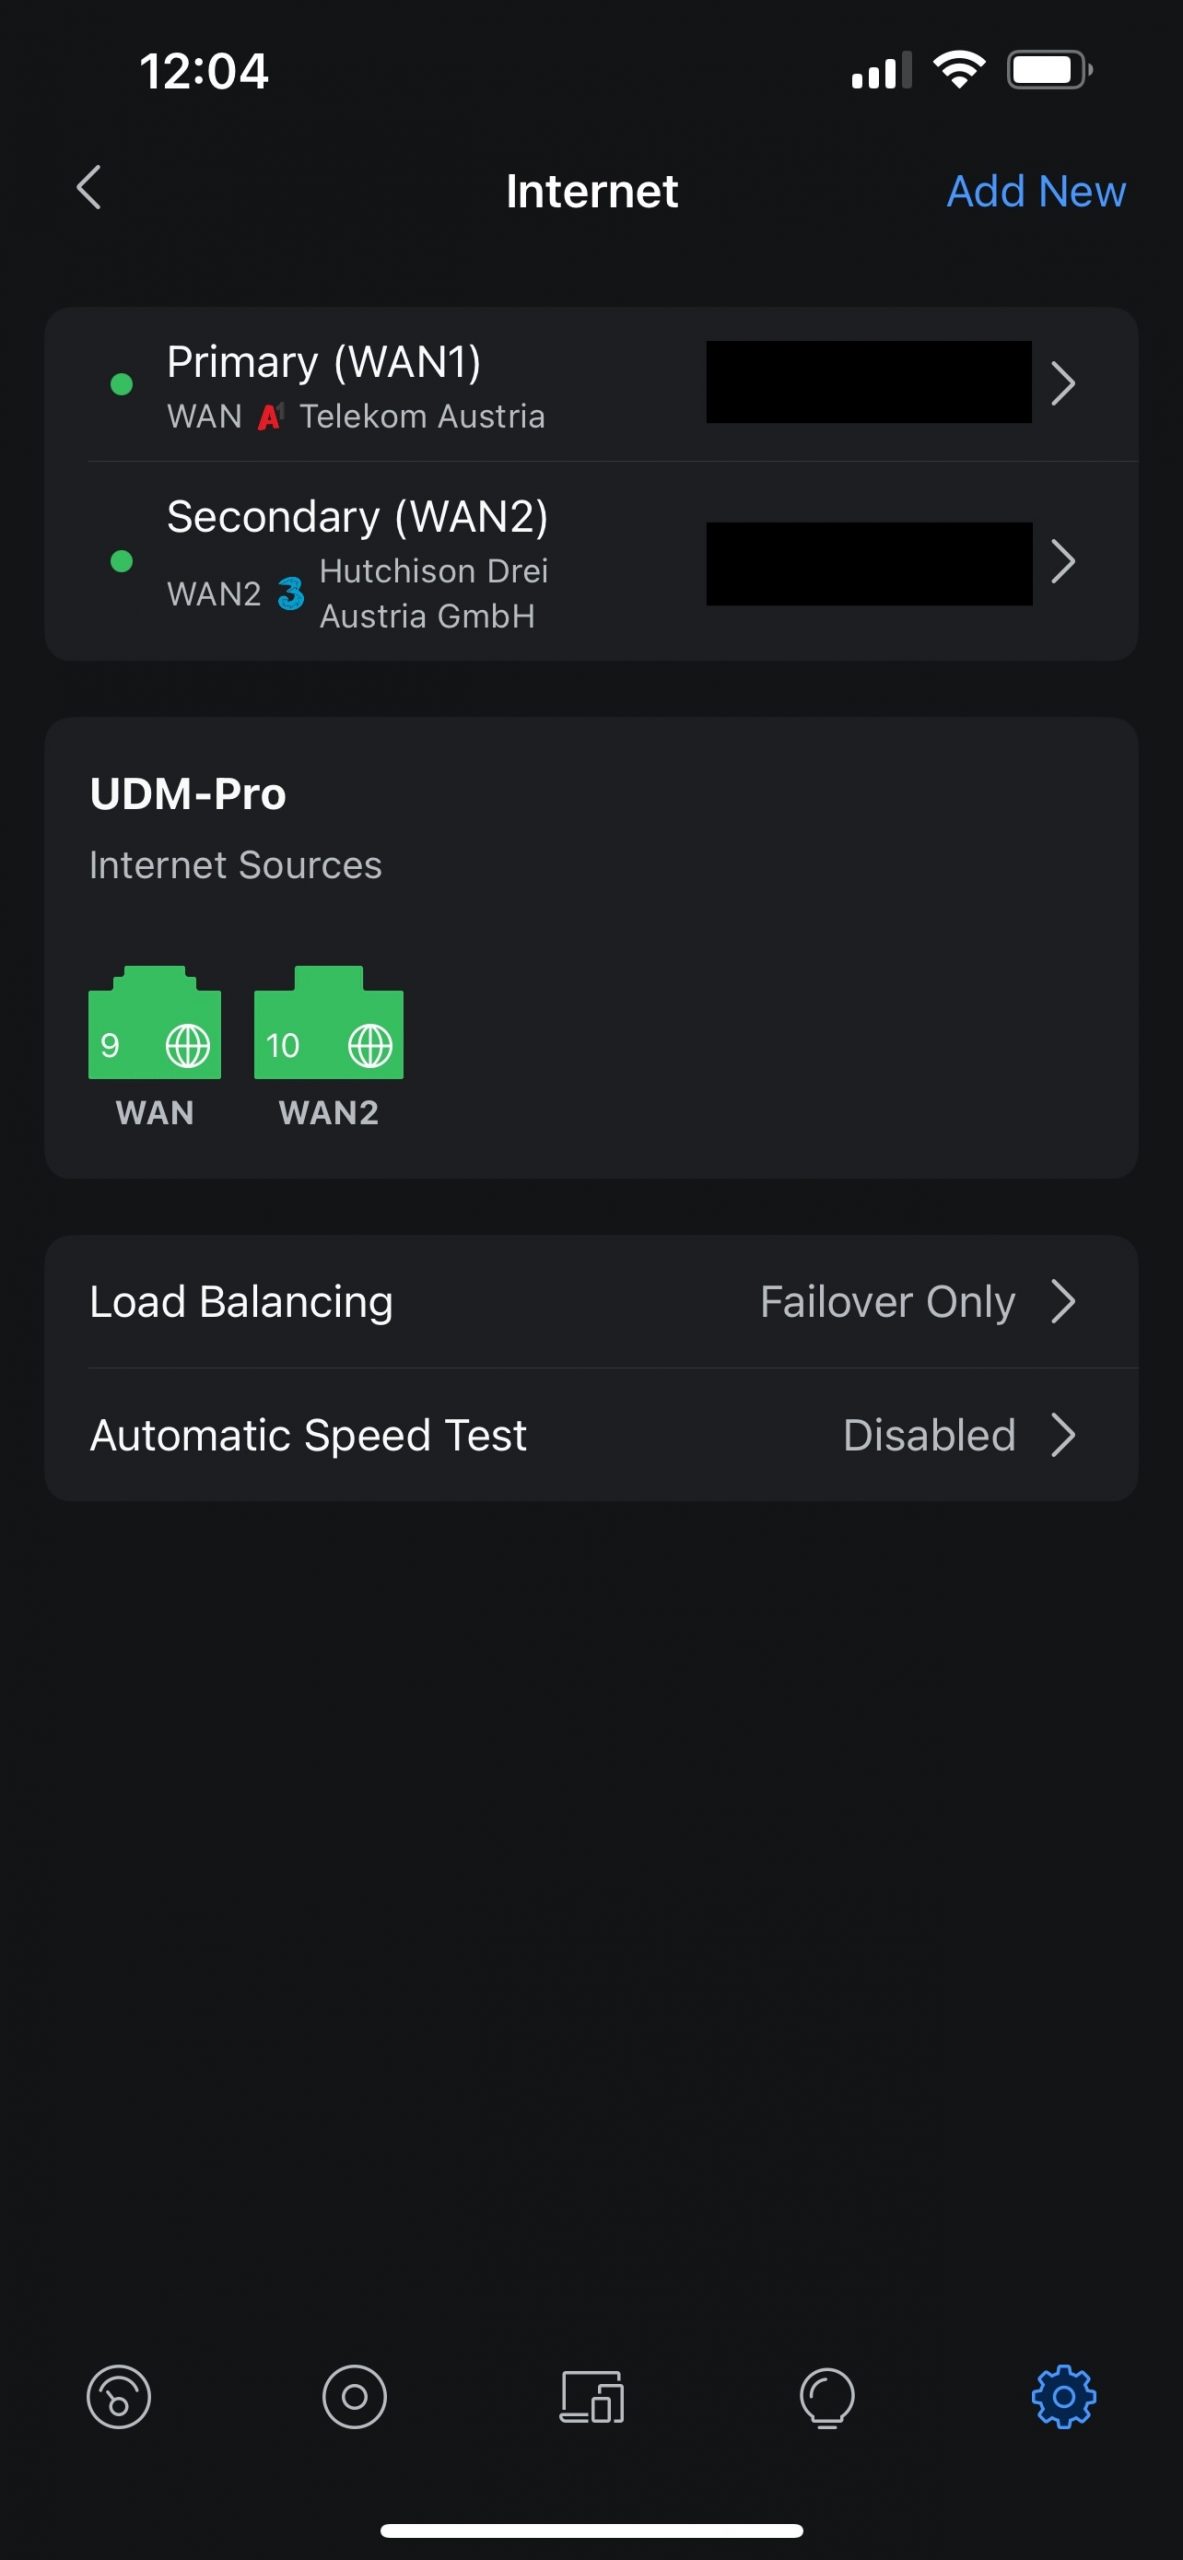
An important feature of the 5G connection is that it comes with a static, publicly accessible IP address, which is essential for me. I frequently need to access my Home Lab remotely, especially when working with cloud platforms. For example, during my live training on SQL Server on Microsoft Azure, I demonstrated how easy it is to establish a VPN connection between my Home Lab and Microsoft Azure.
One of the two Ubnt switches is used to connect the 1 Gbit wiring from each room to the network. Additionally, we have PoE-powered Wi-Fi Access Points installed on each of the three floors of our house to ensure strong wireless coverage. The second Ubnt switch and the Cisco Nexus switch are only powered on when the Compute Stack is active, helping to conserve power. Speaking of power – the Cisco Nexus 3064 switch is a serious piece of hardware:
- 48× 10 Gbit ports
- 4× 40 Gbit ports
All ports use SFP+ or QSFP+ connections, and I purchased the switch refurbished on eBay back in 2017.
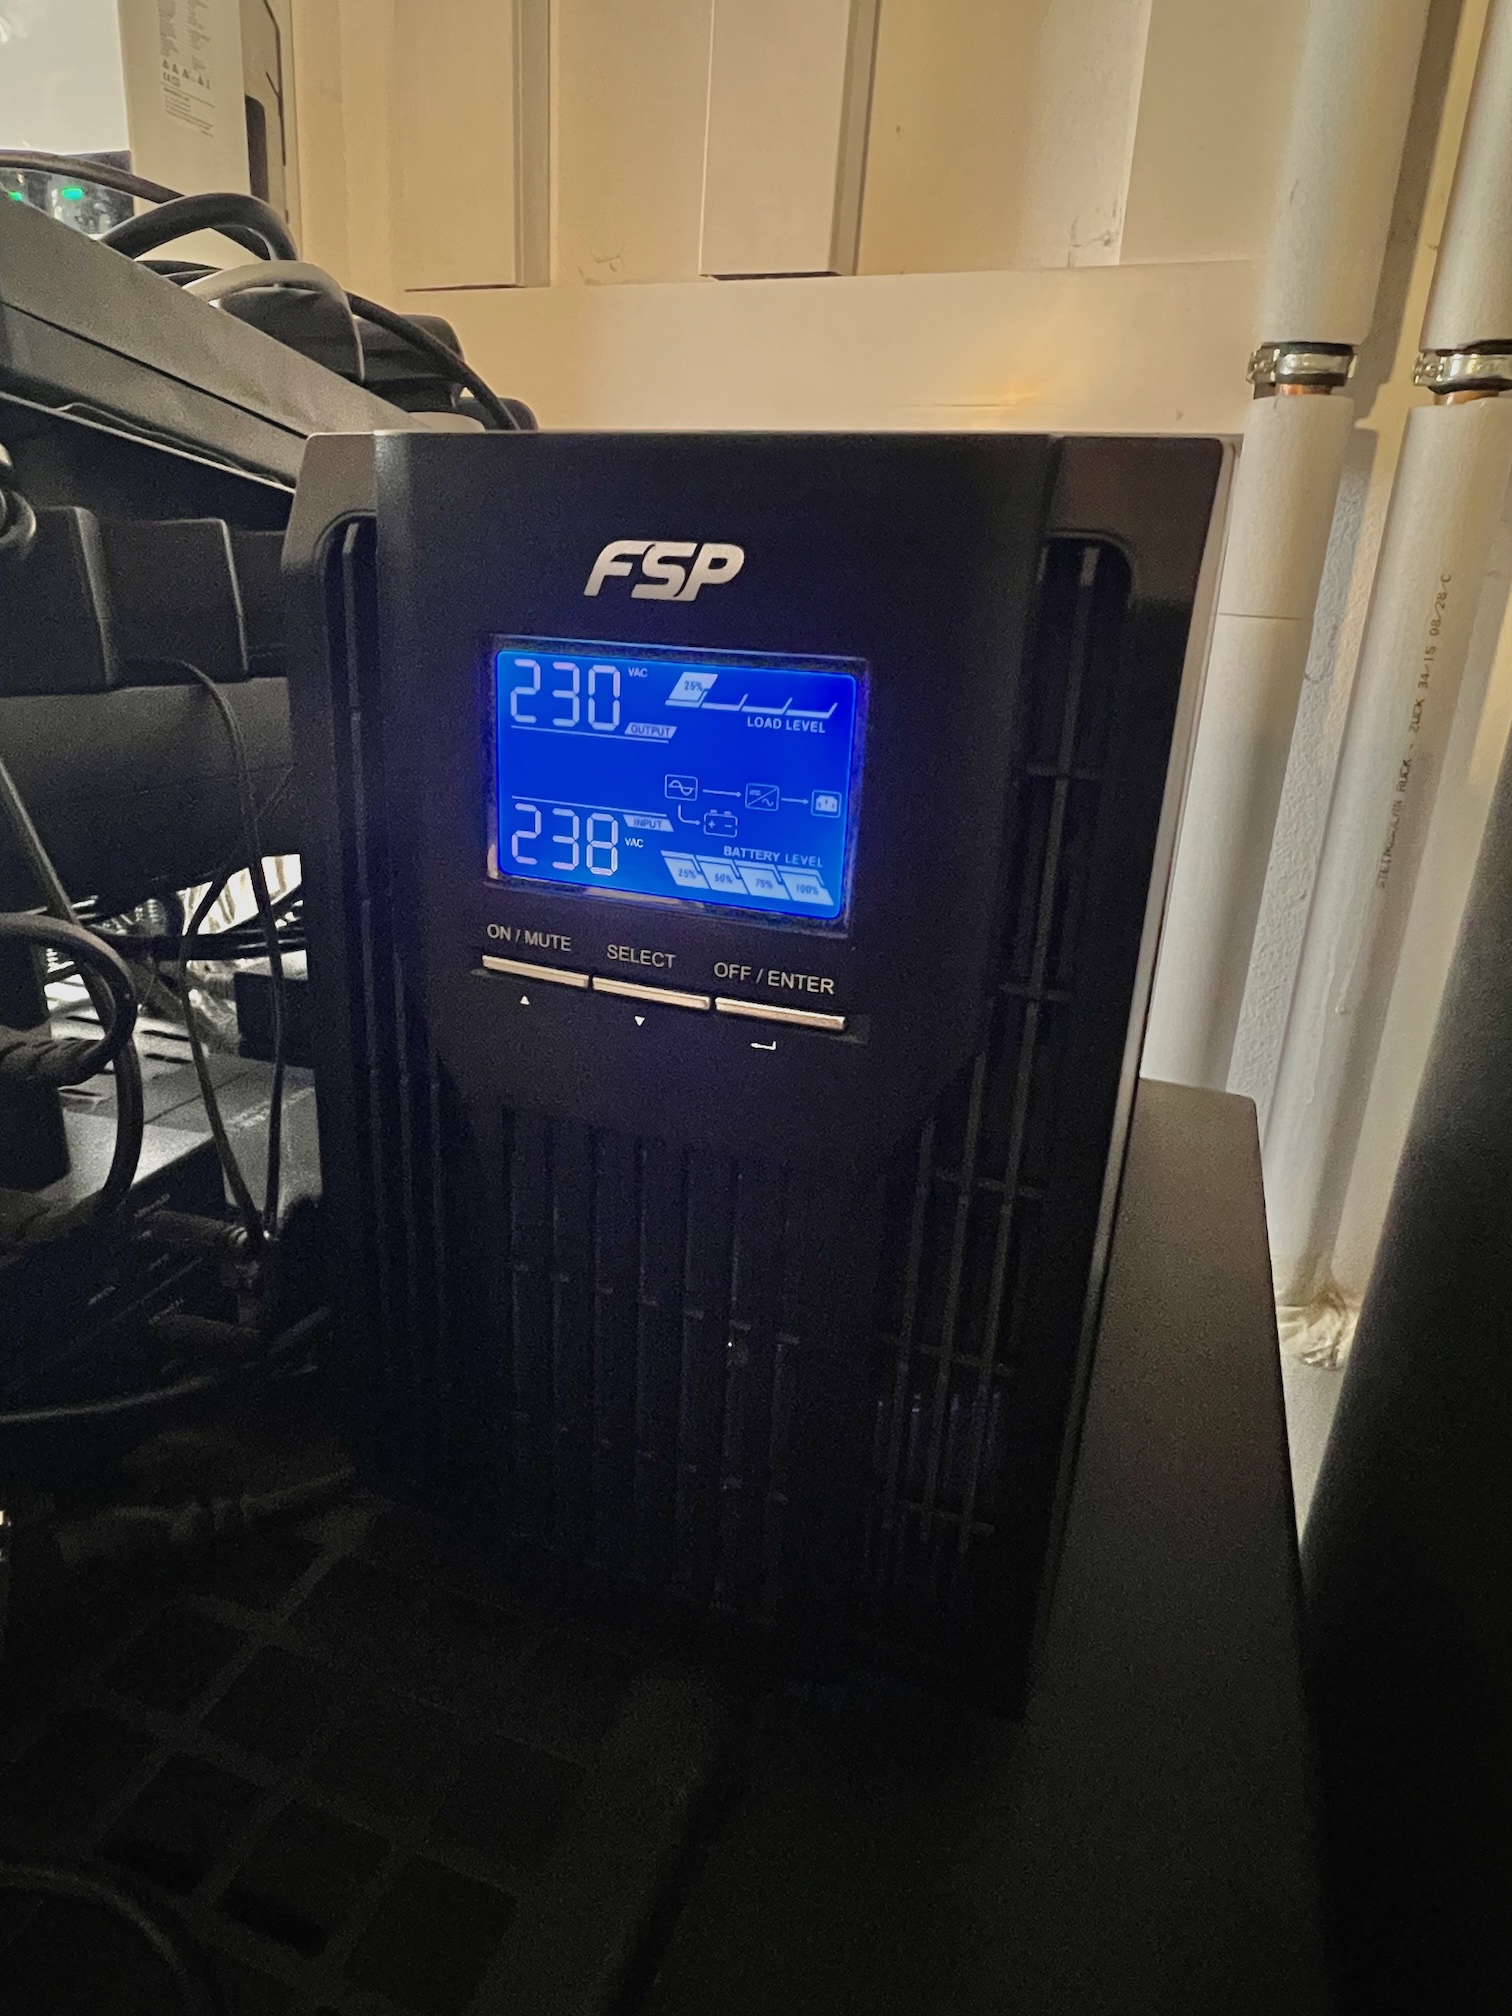
As mentioned earlier, our electrical system can automatically switch to battery power when the main grid goes down. However, this failover takes around one second – and that’s more than enough to crash everything in the server rack. To address this, the entire server rack, along with the mobile 5G modem, is connected to a UPS (Uninterruptible Power Supply). The UPS can handle a continuous 2 kW load for at least 10 minutes, which is more than enough to keep the Home Lab online during a short outage or until the solar battery system kicks in.
Now, when a power failover occurs, we barely notice it. The entire network infrastructure – including the Wi-Fi Access Points – remains online, since the APs are powered via PoE from the switches connected to the UPS. The only sign of the switchover is a slight flicker in the ceiling lights 😊.
Compute Stack
Now let’s focus on the heart of my Home Lab – the Compute Stack. The Compute Stack consists of three dual-socket HP DL380 Gen8 servers. These servers, along with the second Ubnt switch and the Cisco Nexus switch, are only powered on when needed – to save energy.
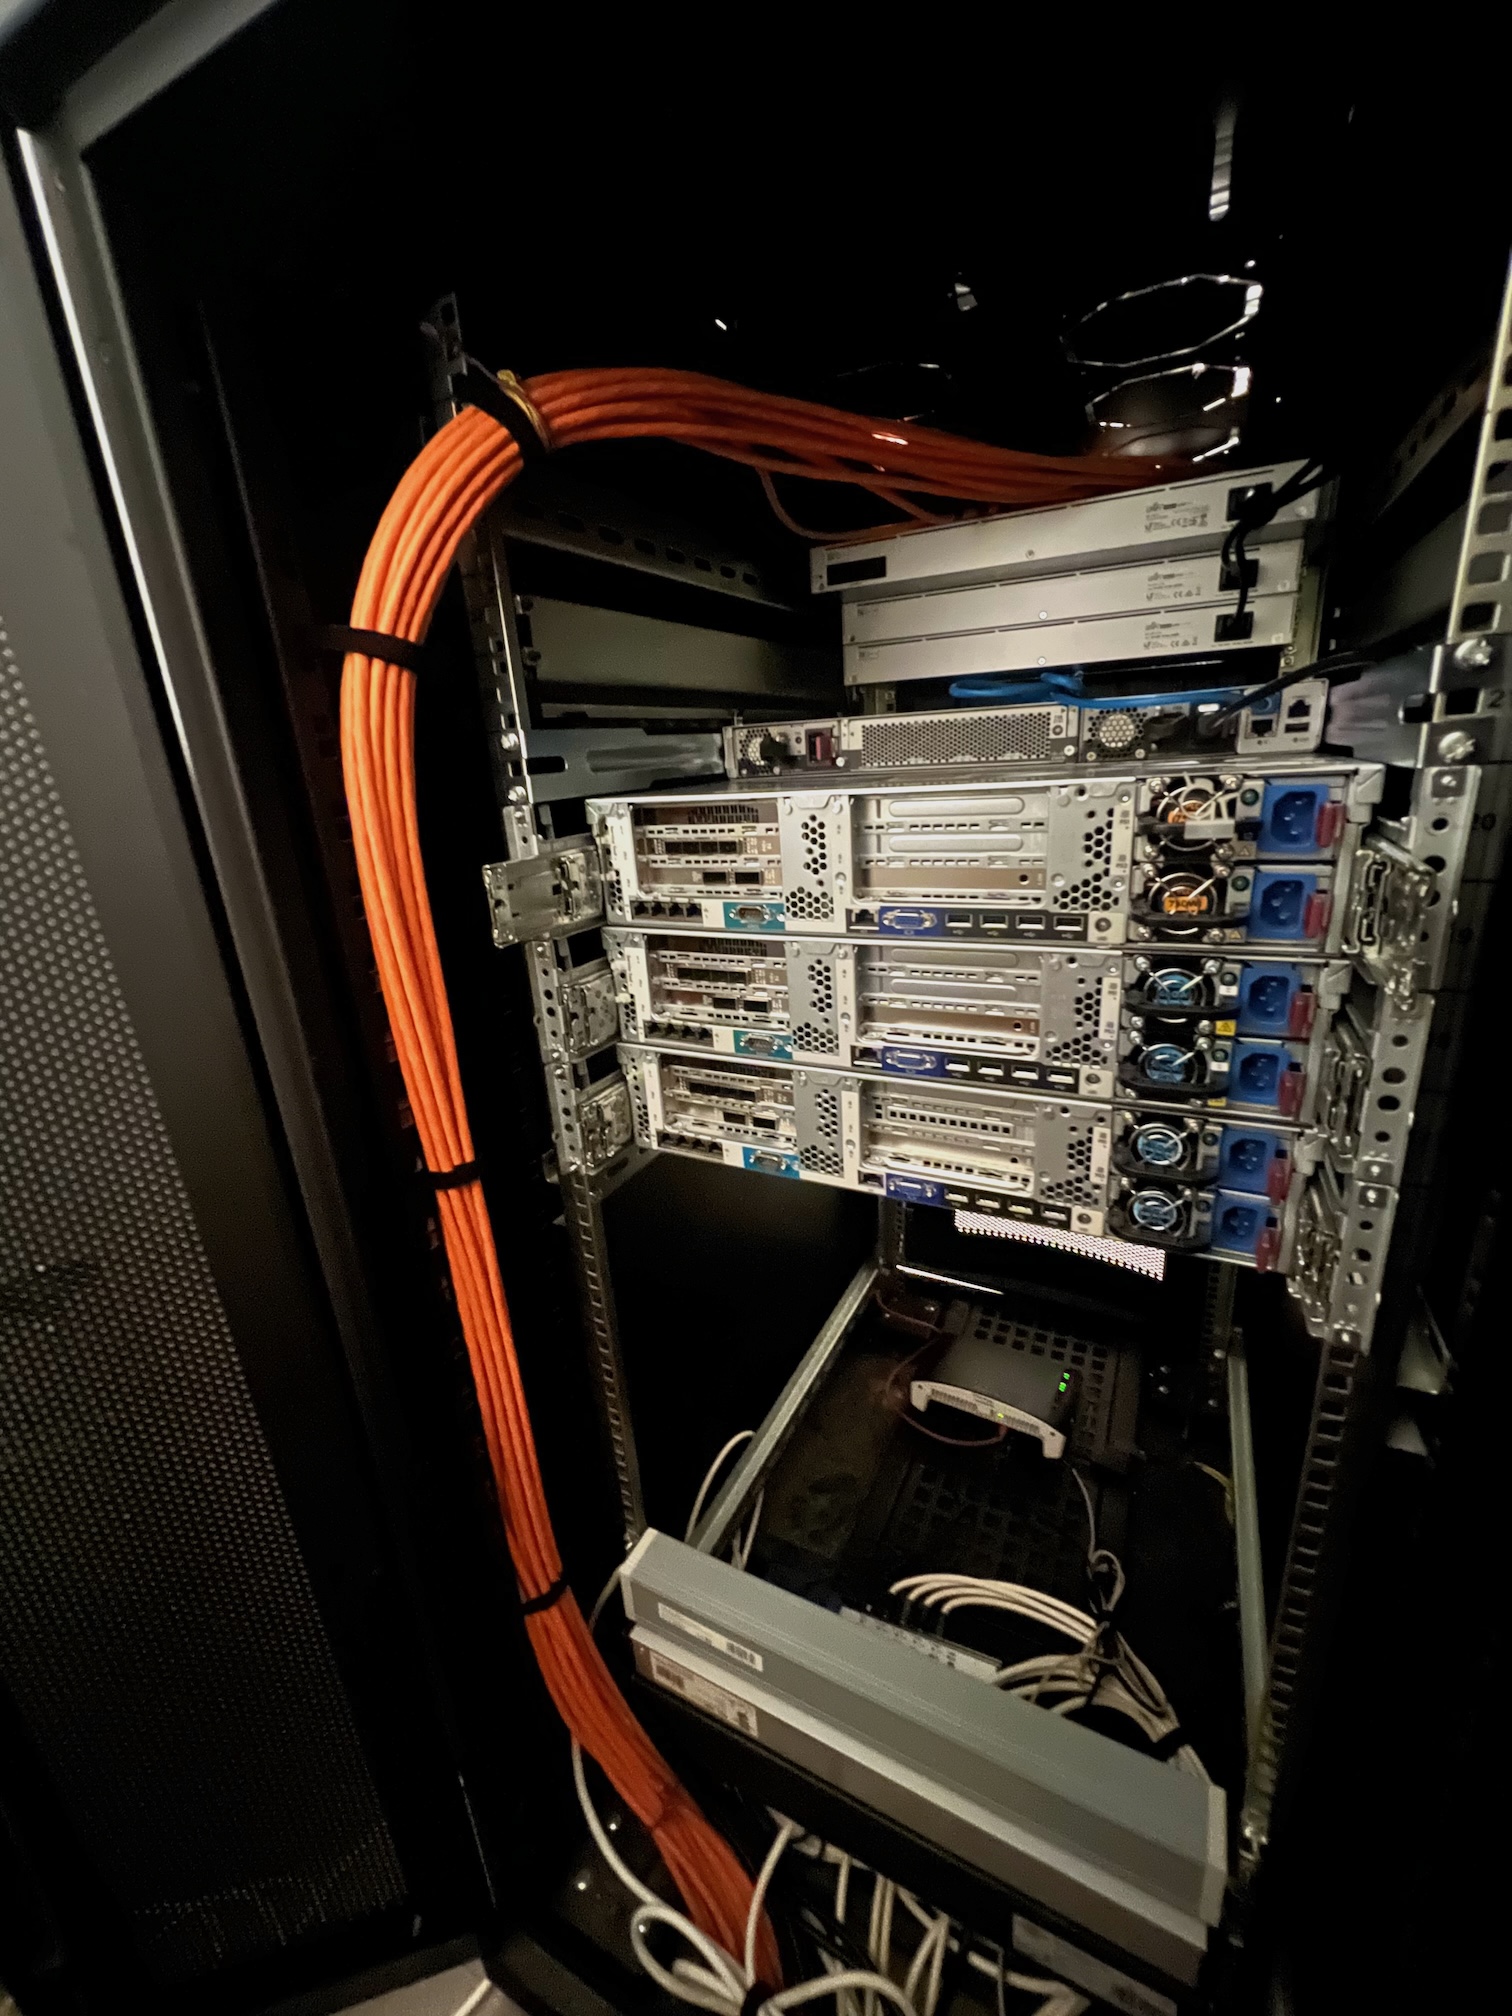
Each server is configured with two CPU sockets in a NUMA setup, which was an important requirement for me. It allows me to demonstrate NUMA configurations and highlight the potential performance pitfalls when systems are misconfigured – especially relevant for SQL Server workloads.
Here’s the hardware configuration of each server:
- 2× Intel Xeon E5-2650 CPUs @ 2 GHz (16 physical cores/32 logical processors total)
- 256 GB RAM (16× 16 GB DIMMs)
- 1st PCIe Riser Card
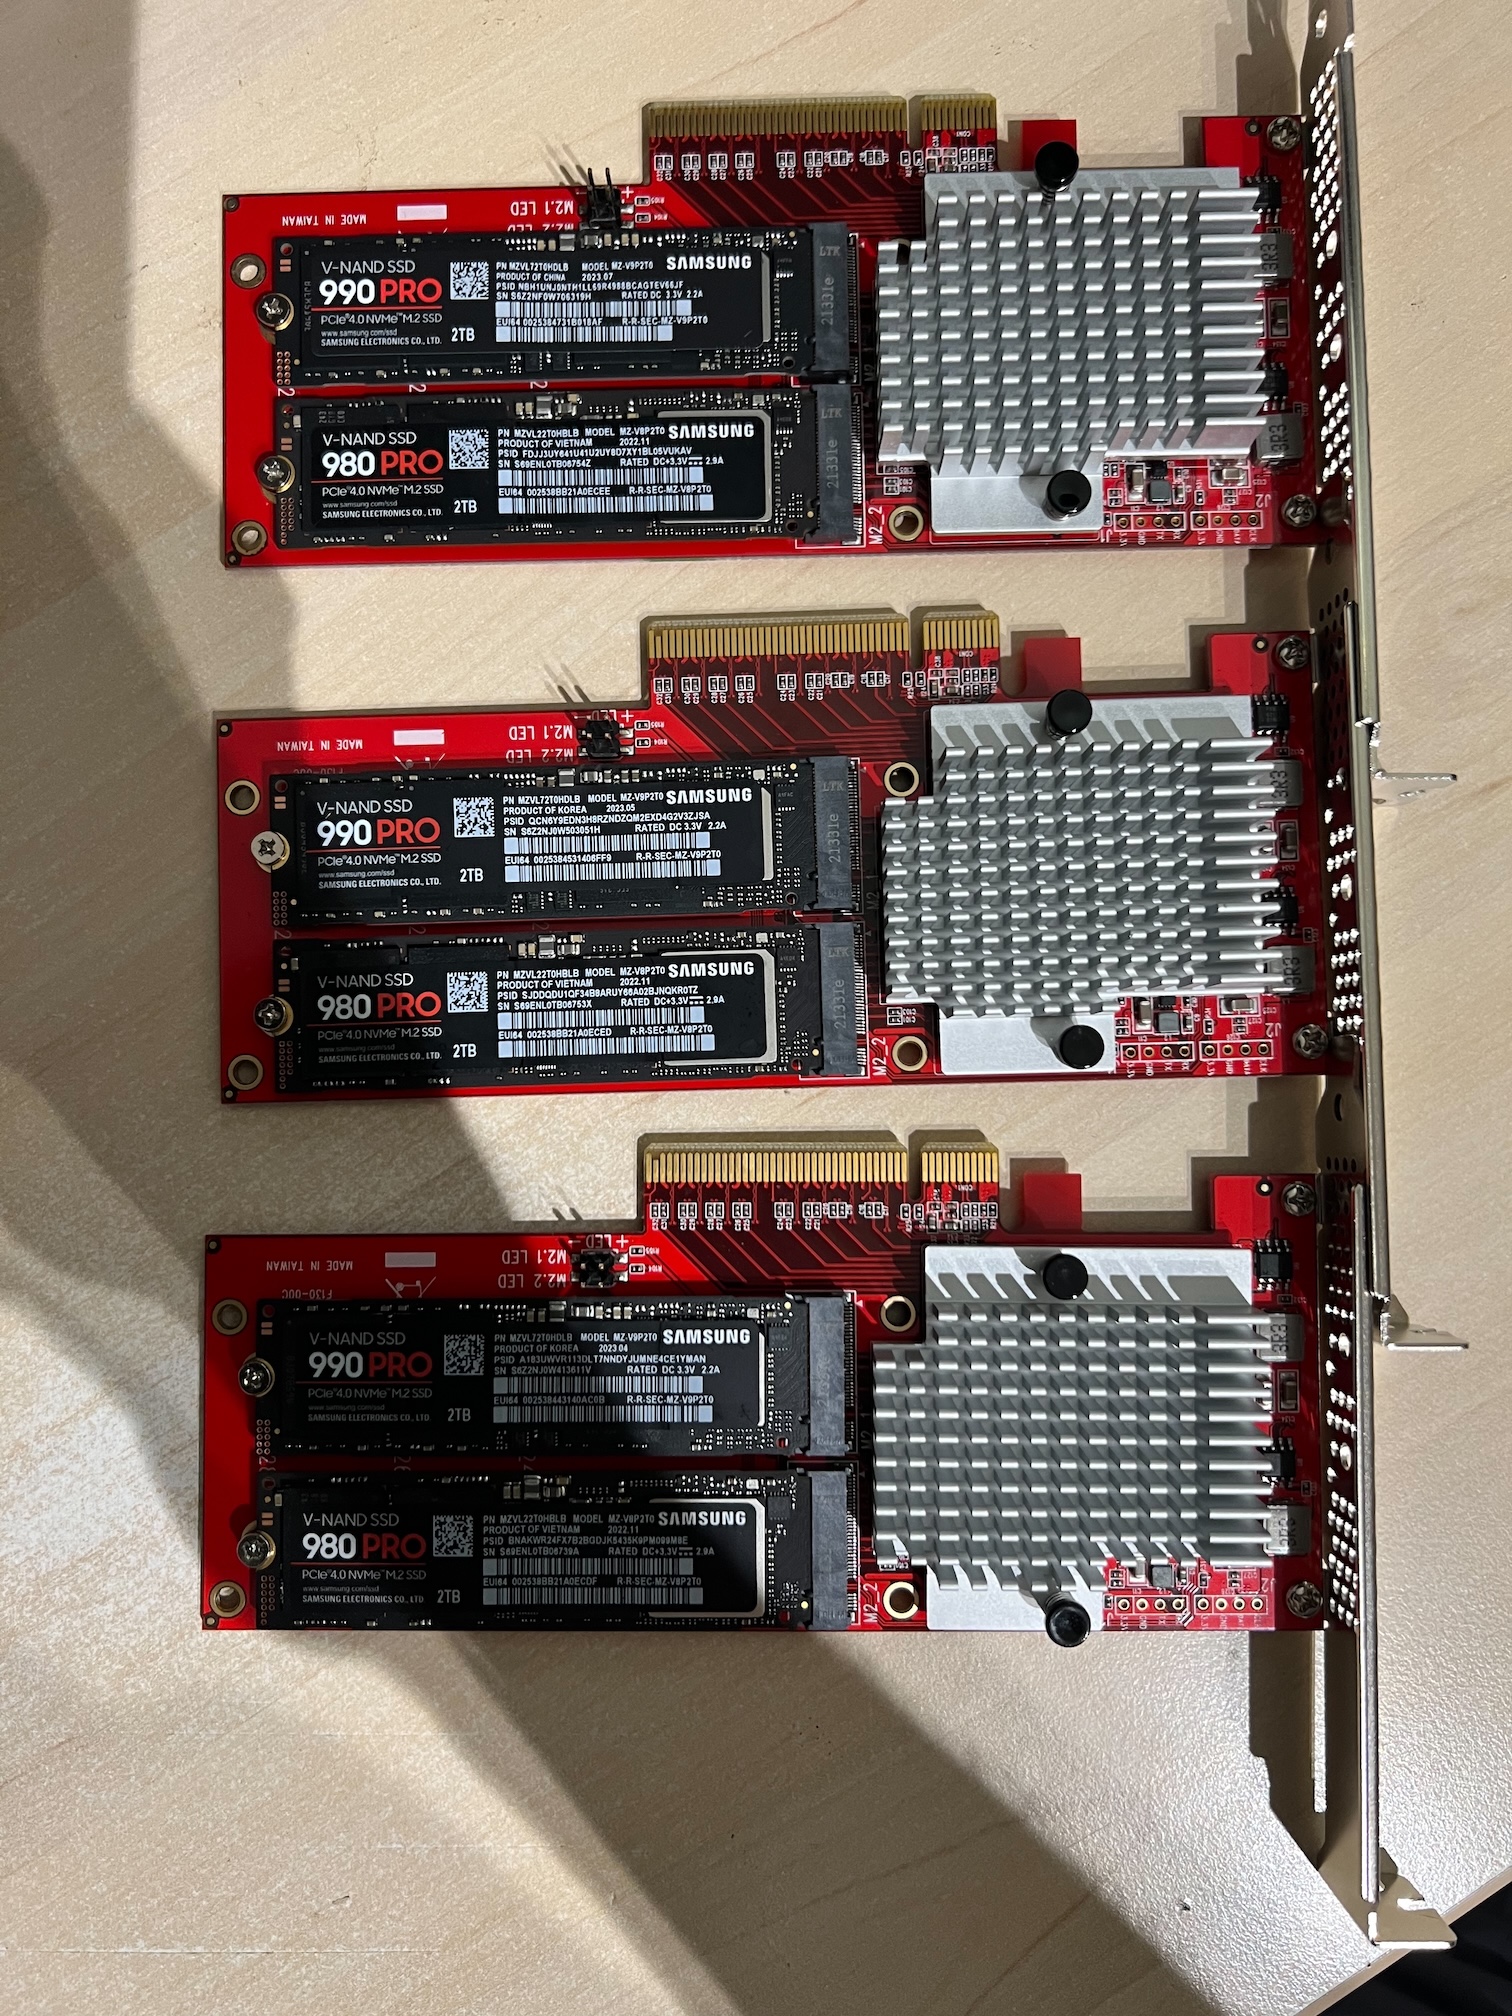
- Slot 1: Dual M.2 PCIe SSD adapter with 2× Samsung 980/990 2 TB M.2 SSDs
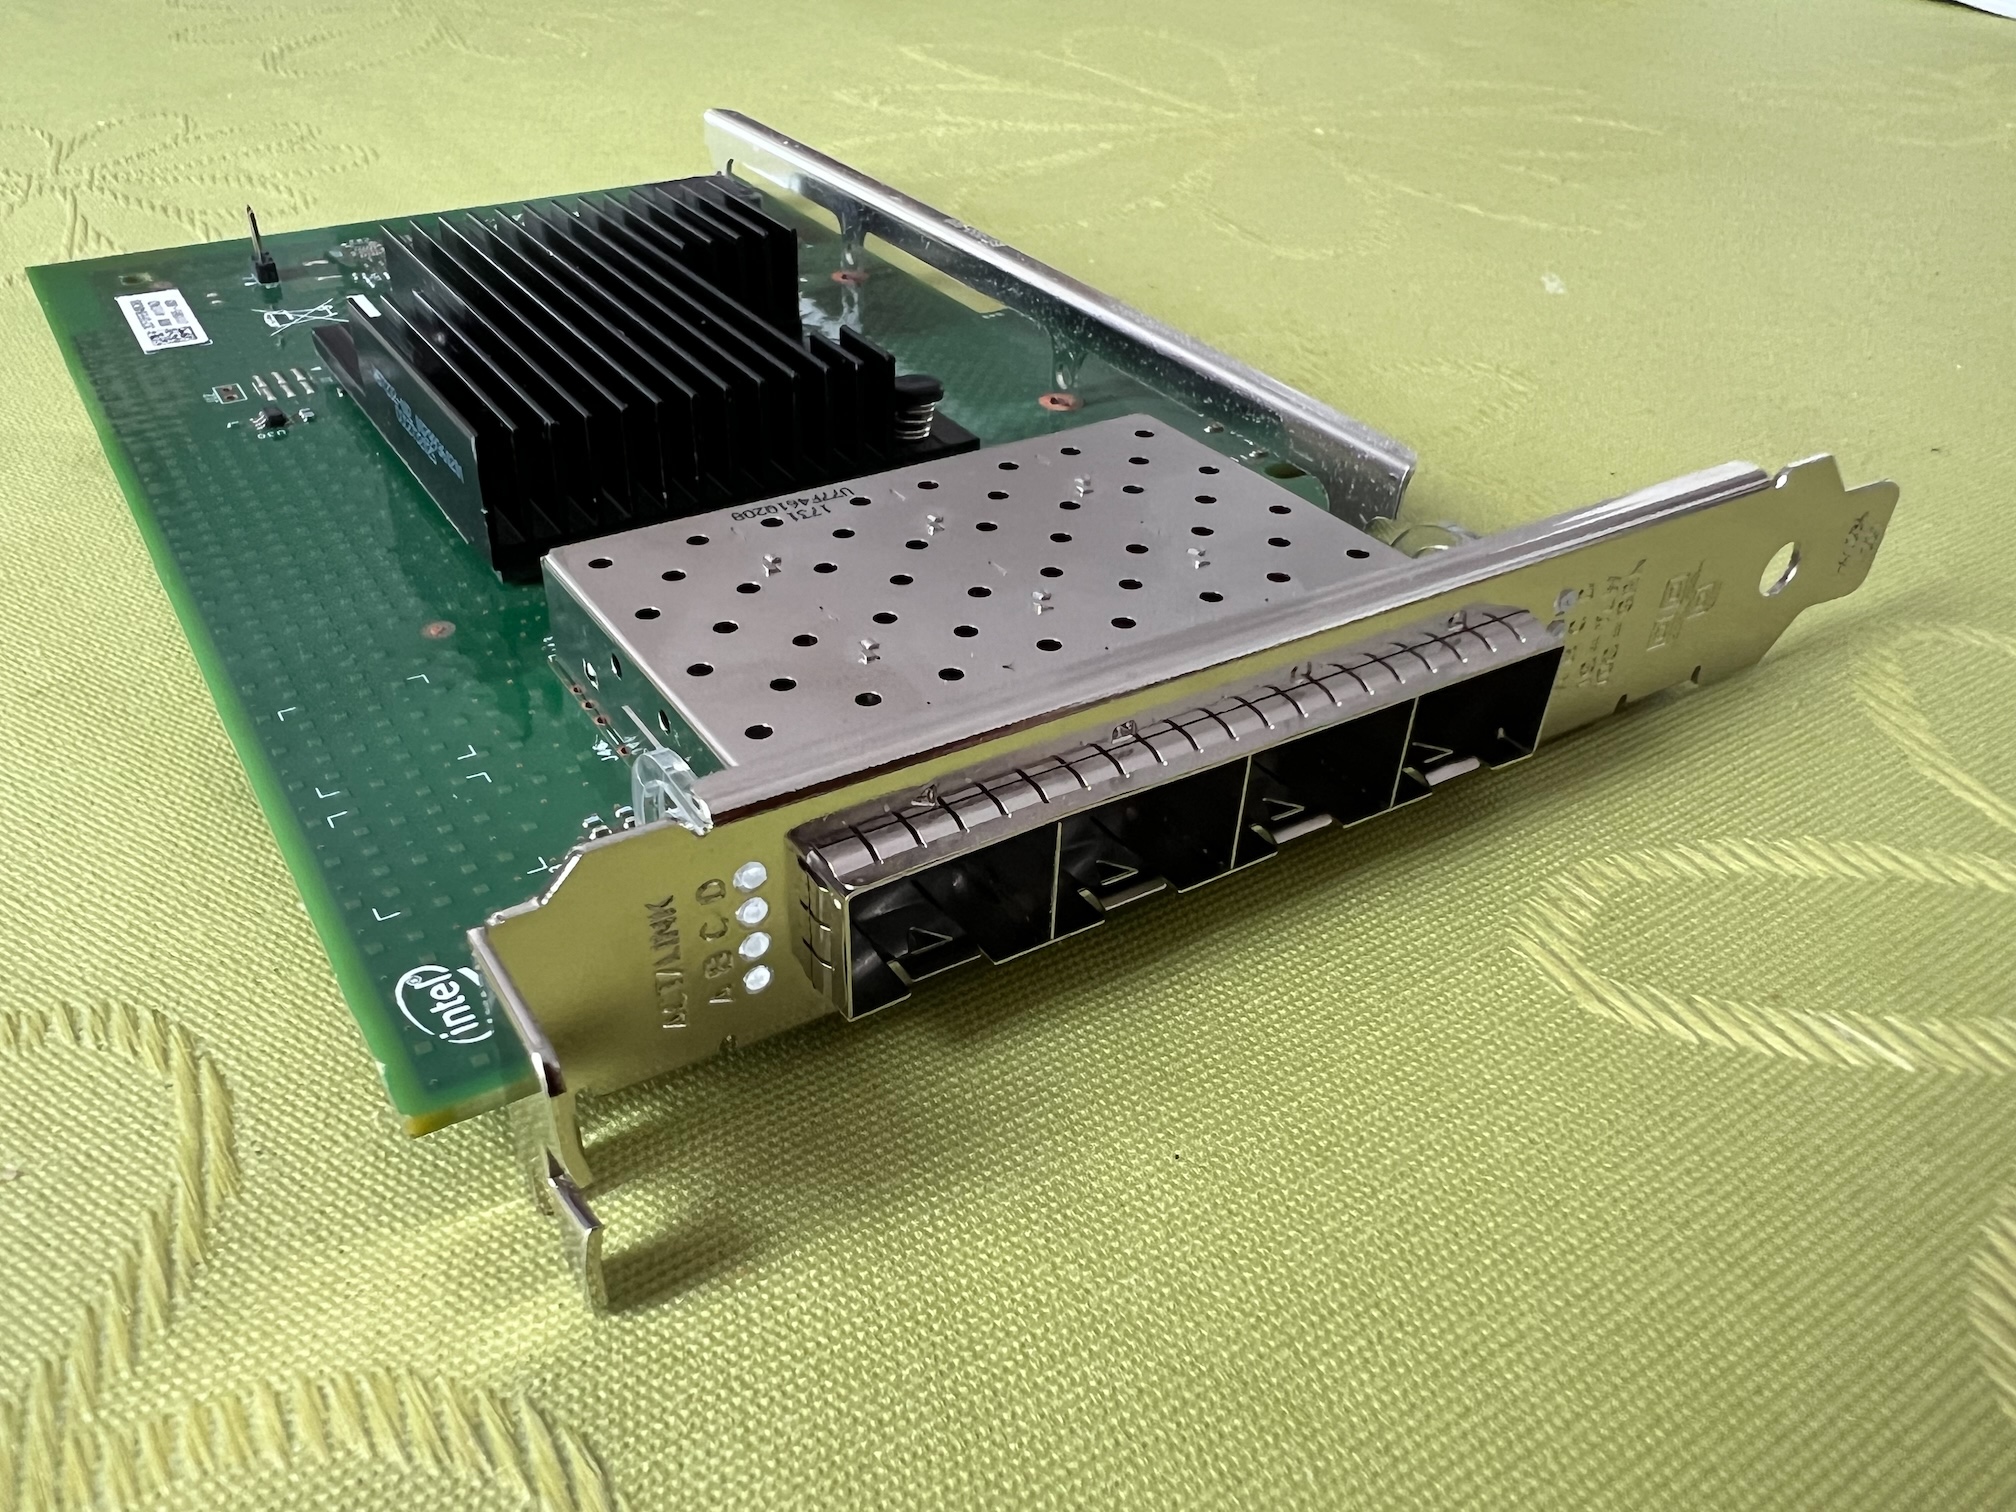
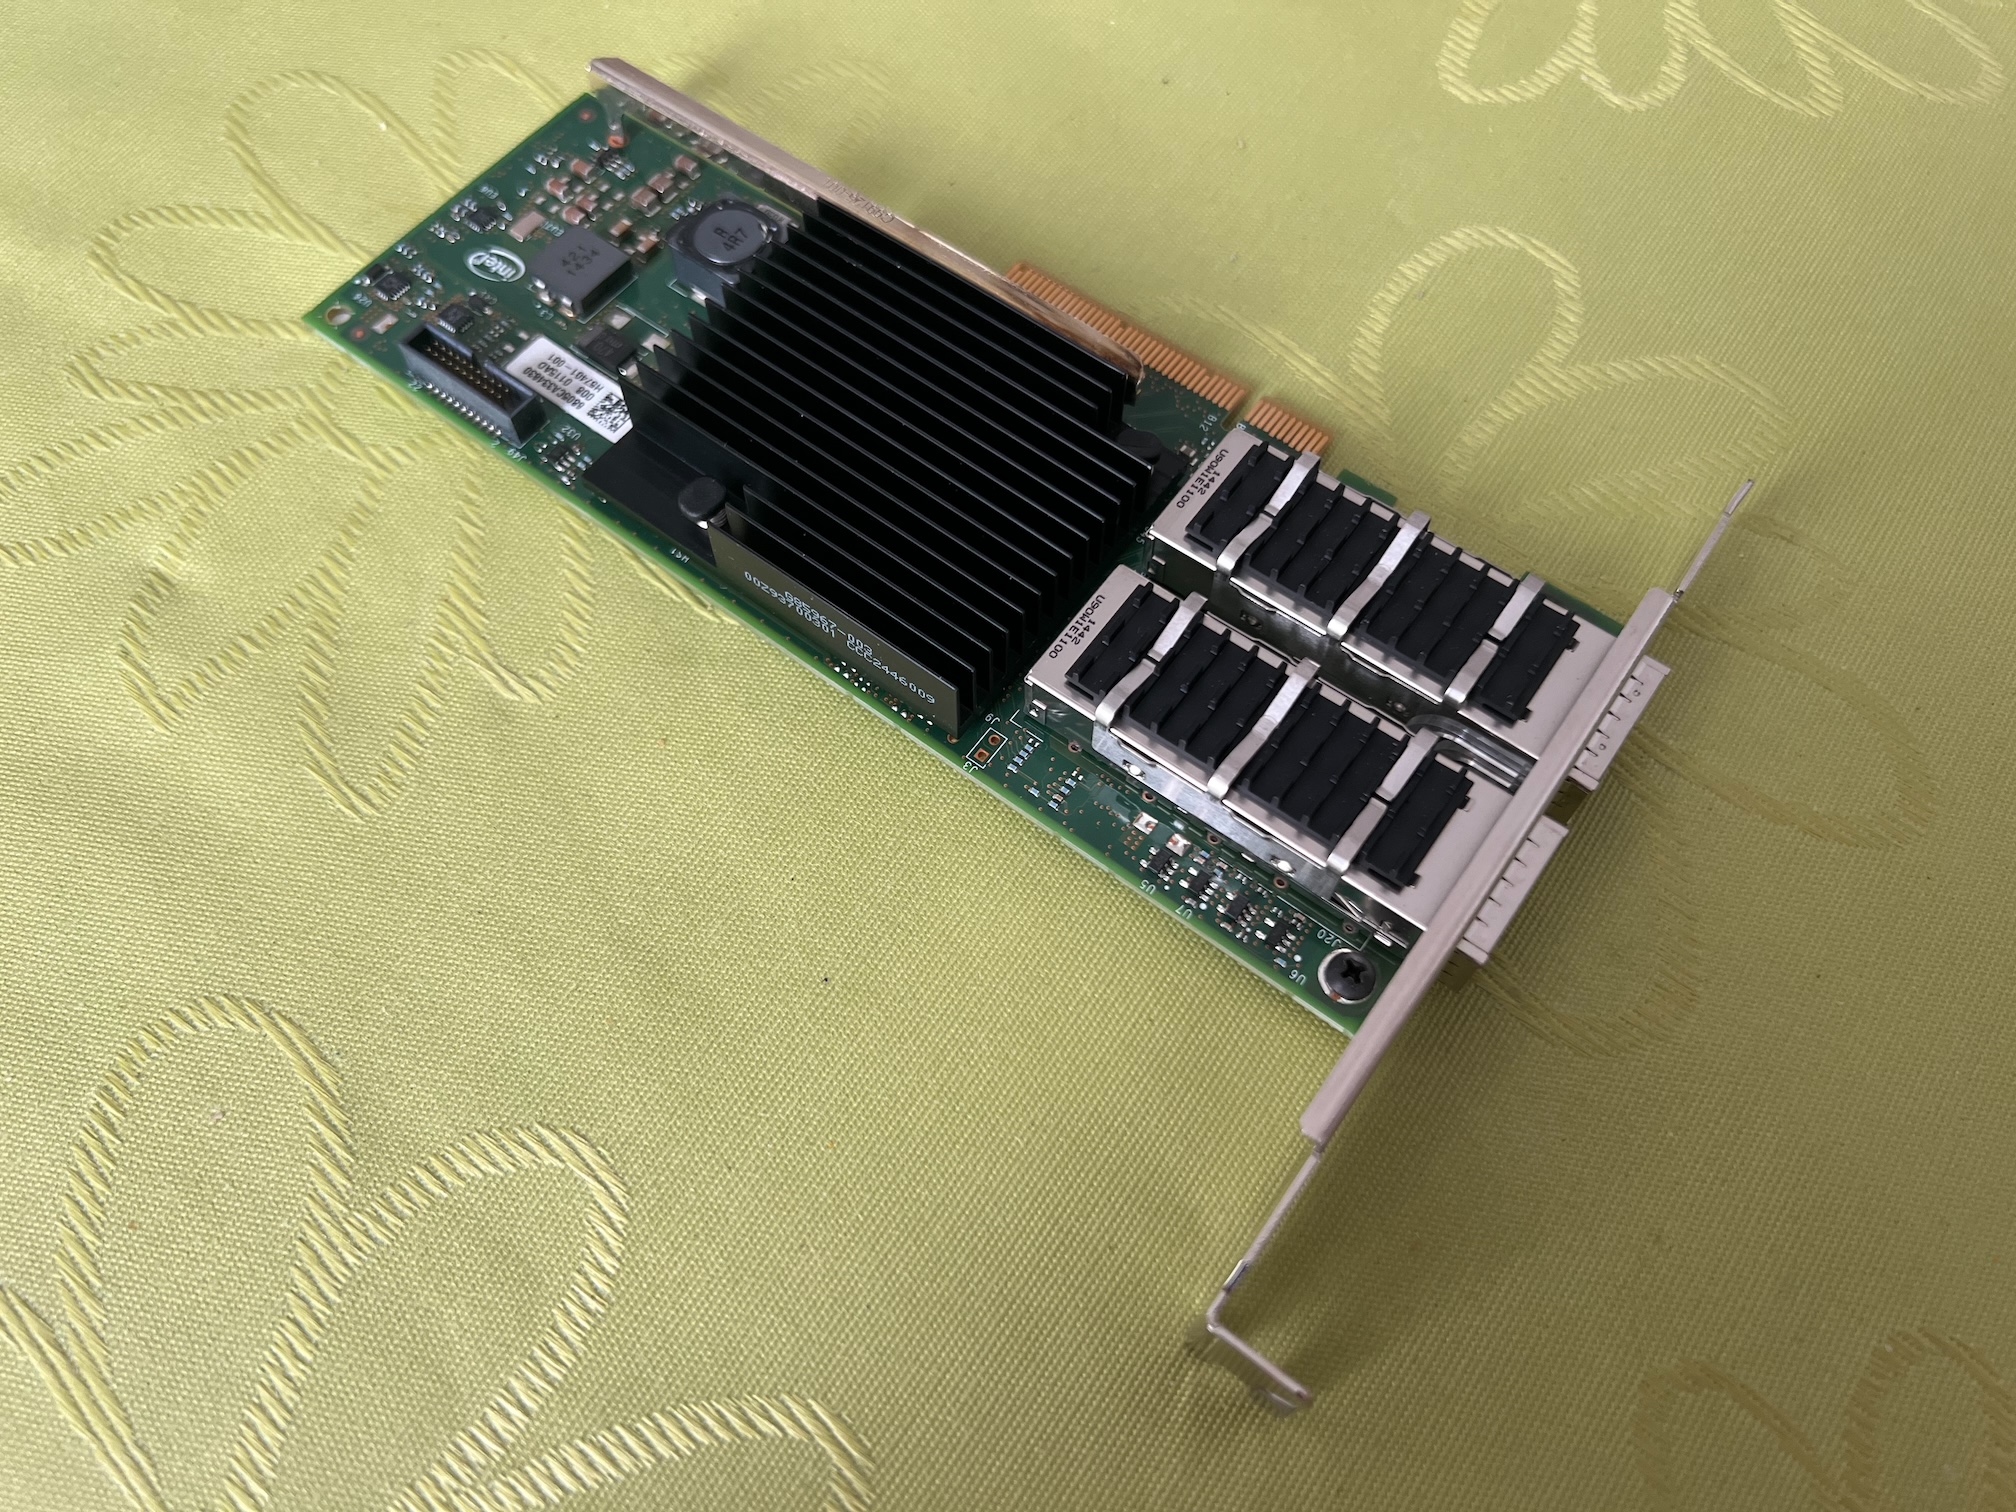
- Slot 2: Intel X710-DA4FH NIC (4× 10 Gbit ports)
- Slot 3: Intel XL710-QDA2 NIC (2× 40 Gbit ports)
- 2nd PCIe Riser Card: Currently free – reserved for a potential GPU upgrade
- 1× Samsung EVO 850 500 GB SSD (boot drive)
The HP DL380 Gen8 servers support up to 384 GB RAM each (24× 16 GB DIMMs), which means the Compute Stack could scale up to more than 1 TB of total RAM – a pretty impressive capacity for a home setup!

Each server is equipped with an Intel X710-DA4FH NIC with 4× 10 Gbit ports, all of which are connected to the Cisco Nexus 3064 switch. In addition, the Intel XL710-QDA2 network card provides 2× 40 Gbit ports, of which one port per server is connected to the Nexus switch (since the switch only has 4× 40 Gbit ports in total).
These high-speed links will become particularly important in future blog posts when we explore Software-Defined Storage and Live VM Migration in Proxmox. Each server also includes a Dual M.2 PCIe SSD adapter, allowing direct PCIe-level attachment of two Samsung 980/990 2 TB M.2 SSDs. This setup ensures low latency and high throughput for local storage access – perfect for testing IO-intensive SQL Server workloads or SDDC scenarios.
Summary
As you’ve seen, we have a very reliable power and internet setup here in our house in Vienna. On top of that, I’ve built a serious Home Lab environment that allows me to simulate a wide variety of workloads – ideal for testing, learning, and teaching.
Despite its capabilities, the Home Lab is surprisingly power-efficient. Each HP server consumes only around 200 watts when idle or under light load. When everything is powered on, the entire server rack draws about 900–1000 watts, which is quite manageable – especially considering the performance it delivers.
In my next blog post, I’ll walk you through how to install and configure Proxmox, the hypervisor I’m currently using to run everything in the lab. If you have any questions or feedback, or if you’d like to share how your own Home Lab is set up, feel free to leave a comment – I’d love to hear from you!
Thanks for your time,
-Klaus
4 thoughts on “Solar-Powered, Proxmox-Driven: A Tour of My Ultimate SQL Server Home Lab”
Hallo Klaus, how interesting!! I have retired from IT and the Microsoft stack (with a specific interest in SQL Server) a couple of years ago but I’m still interested to read about technology and really cool projects (like yours).
Alles Gute,
Robert
Hello Robert,
Cool, that you like my project 🙂
Thanks,
-Klaus
Looking forward to the VM Live Proxmox migration blog. I would have imagined that log shipping and/or mirroring is the way to go for a home lab. Looking forward to the post.
Also, very very cool setup for a Home Lab. Many companies would wish for this setup 🙂
Hello Andon,
Thanks for your comment.
With VM live migration, I meant how you can move a running VM from one Proxmox host to another one.
Thanks,
-Klaus