Yesterday evening (European Time zone) Microsoft has released the SP2 for SQL Server 2008 R2. You can download the Service Pack here: http://www.microsoft.com/en-us/download/details.aspx?id=30437
Because I’m currently working on a Database Mirroring Test Lab that is based on SQL Server 2008, I thought it would be a good exercise to perform a Rolling Upgrade to SP2 and document the correct sequence in this blog posting. In my Lab I have 3 Virtual Machines that are performing the following roles:
- VM1: Principal
- VM2: Mirror
- VM3: Witness
When you are performing a Rolling Upgrade you have to do 2 failovers (Principal => Mirror => Principal), which means that you should perform the upgrade at a time where the user impact of those failovers is very little. The idea of a Rolling Upgrade in a Database Mirroring scenario is very straightforward:
- Disable the Witness (when you are using Automatic Failovers)
- Install the Service Pack on the Mirror
- Failover to the upgraded Mirror
- Install the Service Pack on the old Principal
- Failover to the upgraded Mirror
- Install the Service Pack on the Witness
- Add the Witness back to the Mirroring session
Let’s have a more detailed look at these steps.
1. Disable the Witness
In my lab I have a dedicated VM which acts as a Witness to provide automatic Failovers. In that case, you have to remove the Witness from your Database Mirroring session:
ALTER DATABASE TPC_E SET WITNESS OFF
GO
Before you remove the Witness you should also write down its network address, because you need that address afterwards, when you want to add the Witness again to the Database Mirroring session. You can use the view sys.database_mirroring to find out the network address of the Witness:
SELECT
   database_id,
   mirroring_witness_name
FROM sys.database_mirroring
GO
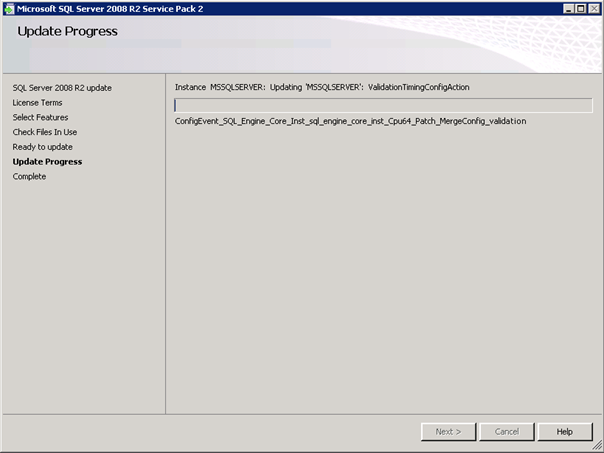
2. Install the Service Pack on the Mirror
In the next step you can install the Service Pack on the Mirror. The update process itself just takes a few minutes and during the process your SQL Server Instance on the Mirror is restarted.
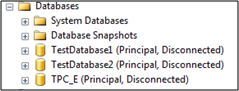
During the restart, your Principal runs in the Exposed state, which means, when you lose your Principal in that timeframe, your database is down.
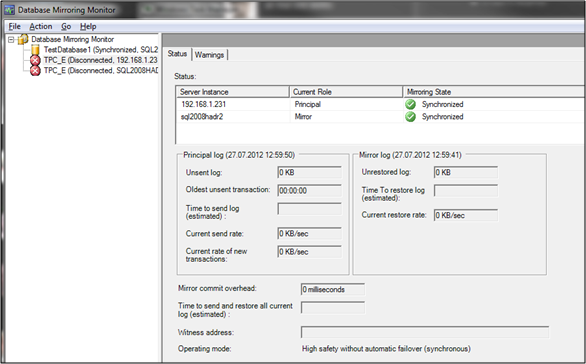
As soon as your SQL Server Instance is restarted, the upgraded Mirror is automatically synchronized with the Principal:
3. Failover to the upgraded Mirror
In the next step you have to failover to the upgraded Mirror, which will become the new Principal in your Database Mirroring session.
ALTER DATABASE TPC_E SET PARTNER FAILOVER
GO
During the failover your applications have to reconnect to your SQL Server databases, which means you could have a short outage (it mainly depends on how well-written your applications are…). During the failover the new Principal (the old Mirror) has also to redo all transactions from the REDO queue, which also impacts how long the failover will actually take.
Note: Only the Enterprise Edition SQL Server will provide you multiple REDO threads. You will get 1 REDO thread for every 4 CPU cores that are assigned to your SQL Server (per database). In Standard Edition the REDO is always done with just 1 thread (per database).
As soon as the failover completed, your new Principal will run on the new Service Pack Level:
Microsoft SQL Server 2008 R2 (SP2) – 10.50.4000.0 (X64) Jun 28 2012 08:36:30 Copyright (c) Microsoft Corporation Developer Edition (64-bit) on Windows NT 6.1
4. Install the Service Pack on the Mirror (the old Principal)
After you have applied the new Service Pack to the old Mirror, you just do the same on the old Principal.
5. Failover to the upgraded Mirror
After you have installed the Service Pack on the old Principal, you again fail back to the upgraded old Principal.
ALTER DATABASE TPC_E SET PARTNER FAILOVER
GO
Now both the Principal and the Mirror are running on the new Service Pack Level, and you are almost complete with your Rolling Upgrade. The only thing that is left is the upgrade of the Witness, when you are using it for providing Automatic Failovers.
6. Install the Service Pack on the Witness
Nothing special is to note here.
7. Add the Witness back to the Mirroring session
As soon as your Witness is also upgraded, you can add the Witness back to your Database Mirroring session:
ALTER DATABASE TPC_E SET WITNESS = 'TCP://sql2008hadr3.sqlpassion.com:5022'
GO
Conclusion
As you have seen in this blog posting, installing a new Service Pack through a Rolling Upgrade in a Database Mirroring scenario is not a big deal. But you have to plan it carefully, because you have to do 2 failovers, and those failovers will impact your applications.
Thanks for reading!
-Klaus
1 thought on “Perform a Rolling Upgrade to SQL Server 2008 R2 SP2 in a Database Mirroring Scenario”
How about doing a Pause on the DB Mirroring session(s) and then apply SP2? Will that work?
This is a good article – Thank you.
Comments are closed.